Christos Karplus
New Member
- Joined
- Mar 31, 2020
- Messages
- 2
- Reaction score
- 2
Hello everyone, I am new to this forum, however I have been searching around and gathering bits and pieces of information as I go along with this project. To start, I was given a 2006 Jeep Liberty by a family friend, with the foreknowledge that it had a cylinder #2 misfire and would need this solved along with new ball joints to pass Massachusetts state inspection. Now, I am no mechanic guru, however I have a pretty good idea of how to use tools and was not afraid to tackle the project, so I dove in headfirst and here is what I have done:
I started off by messing around with the ignition coils, switching them between cylinders and seeing if the misfire code would switch to another cylinder. With no change, I figured my next best step would be a compression test. I found an old compression testing kit that my father had from way back and first performed a dry compression test. I determined that cylinder #2 was dead with 0 compression, and the others were sitting between 90-100 psi. At this point, I read that putting some oil in the cylinders and re-doing the compression test would help me to further diagnose.. Upon putting oil in I would build compression on a few strokes, leading me to believe that the piston rings were probably toast. Without proper tools for a leakdown test and me being enthusiastic and into the project for free at this point, I decided I would tear into the engine
Progress was slow at first - I wanted to make sure I was doing everything correctly and being organized so that I could put everything back together in the end. I spent a long time figuring out how I was going to remove the timing chain and keep everything aligned, however quickly threw that notion out when I realized if I was doing rings I would need to be rolling over the engine etc. Pulling the heads was fairly straightforward, however I did note some interesting things once I removed the camshaft and valves.
1.) The passenger side head camshaft bearing journal at the forward end of the engine (closest cylinder #2) was deeply scored
2.) There seemed to be a significant amount of carbon buildup on the valves, so I thought maybe this could affect compression as well.
Moving on, I removed the oil pan (man was that a PITA with the cross-member positioning and the 4x4 axle in the way), and proceeded to pull and re-ring pistons. Now, as stated before I am no guru and just wanted to slap everything together so I got the new piston rings in but DID NOT hone the cylinders. Maybe this is my problem, but I will explain more. I decided since I was in this deep on the passenger side, I might as well do the drivers side as well and I had the rings, so I did all 6 cylinders.
After this, I put on new head gaskets, and lapped in all of the exhaust and intake valves by hand. I got the whole engine put back together and to my amazement she started up on the first try. Everything sounded good and when I had done a compression test prior to startup all of the cylinders had 140 psi compression (I was stoked)! It became apparent after running for a few hours on and off (at this point I was trying to burp all the air out of the coolant system) that I had a misfire, and I read the code to be in cylinder 2... Again.
I checked the compression in cylinder 2 and it has 0 compression again. I am kind of at a loss I know I didn't do everything perfectly on the partial rebuild but I am trying to figure out where I can go from here to spend the least amount of money possible and to maybe have a functioning vehicle out of it. Here's some of the problems I am thinking are the case, looking for advice here!
1.) Since I did not hone the cylinders, the #2 rings did not break in properly and are not forming a proper seal (although all other cylinders have good number)
2.) My valve lapping job was inadequate and one of the valves is leaking by
3.) One of my lifters is jammed, they seemed fine when I checked but would this cause the valve to stay open?
4.) Something to do with the camshaft being so grooved at the journal bearing nearest the #2 cylinder
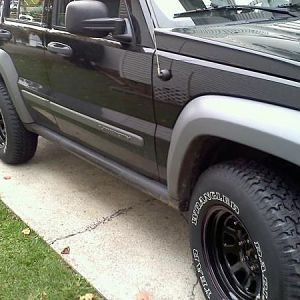
Here are some pictures to go along with it, I have not figured out how to upload more than 3 pictures to this site, if I can figure that out I will certainly post more, as I feel that will be the best way for you guys to help me out. It has been a great journey learning so far and I feel much more confident diving into projects like this now, however I want to see this one out all the way!
View media item 6588
View media item 6590
View media item 6591
Thanks for taking time to read, best
Christos


