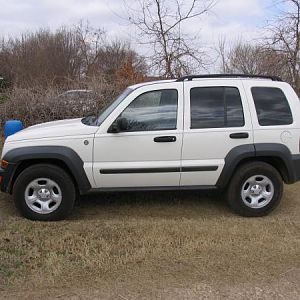
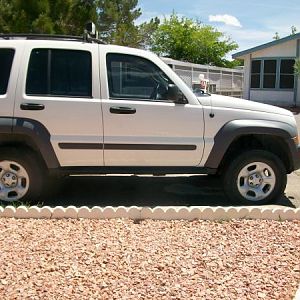
'05 Renegade fixer-upper

Disclaimer: Links on this page pointing to Amazon, eBay and other sites may include affiliate code. If you click them and make a purchase, we may earn a small commission.

Leeann

Full Access Member
Joined
Mar 9, 2013
Messages
2,438
Reaction score
246
Location
Maryland
Figured it was time to get everything in one place…

Brought an '05 Renegade home from my best friend's house free because it had a toasted ******.

You must be registered for see images attach


You must be registered for see images attach


You must be registered for see images attach


You must be registered for see images attach


You must be registered for see images attach


You must be registered for see images attach
 

Leeann

Full Access Member
Joined
Mar 9, 2013
Messages
2,438
Reaction score
246
Location
Maryland
Next up: got the front end of the front driveshaft out. Got all the electrical connections unclipped. Removed the y-pipe (took out the front O2 sensors but only unclipped the rears). Removed the starter. Removed the ****** inspection cover/reinforcement guard thing. Unclipped the ****** shifter cable from the shift lever and the bracket. Couldn't remove the ****** cooler lines because I didn't have a 15/16" or 24mm flare nut wrench. Now I do.

So next is to unscrew the 2 ****** cooler lines after pulling out the clips, bolting the ****** to the ****** jack and unbolting the ****** from the engine. Oh, and I have to move the support jack to the rear of the engine. It's on the back of the ****** right now, since I pulled the transfer case a couple weeks ago.

The rebuild kit, cooler flush and new transfer case position switch will be here Monday. I have to get a new transfer case shift cable clip thing (the big one that holds it in the bracket) from the dealer (I assume it's dealer only?) next week sometime - mine disintegrated as soon as I touched it.

I already have 2 new oxygen sensors to put in front of the cats. I'll simply leave the rears in place. I have new spark plugs, too; none of the service docs I got say anything about the plugs and it's running slightly rough, though that could be from 2 year old gas. It is running a little rich, so I'll change the plugs anyway. And a new air filter and PCV valve. Once it's running again, I'll change the oil too, despite it having 2000 miles on it since the last change.

I will have to clean up the rotors before I put the wheels back on. They're awfully rusty, as could be expected after sitting 2 years. There's some rust on the oil pan that will be easier to get to with all this stuff out, along with a couple spots here and there. I'll get those done before I put the ****** back up.
 

Leeann

Full Access Member
Joined
Mar 9, 2013
Messages
2,438
Reaction score
246
Location
Maryland
Then: Unclipped then unscrewed the ****** cooler lines & let them drip into a pan. Put the ****** jack under the Jeep.

Bought it new manifold to y-pipe exhaust nuts, clips and bolts, new transfer case cable retainer clip and a gallon jug of HOAT antifreeze.

Unhooked the 1 remaining electrical connector (passenger side), ****** vent and dipstick tube, removed the top 2 bolts and the 2 on each side and slid the ****** back off the dowels and dropped it down. The ****** jack worked perfectly, as did a 20" plus 10" socket extension, and universal joint with electrical tape on the joint to make it less wobbly.

You must be registered for see images attach


Wire brushed then rust converted the front half today. Took over 3 hrs, so the back isn't getting done today.

Can't paint for more than 24 hrs while the 4 coats cure.

Man, do Michigan vehicles have a lot of rust on them...
 

Leeann

Full Access Member
Joined
Mar 9, 2013
Messages
2,438
Reaction score
246
Location
Maryland
Next, Wire brushed and rust converted the rear half. About to work on the exhaust (it's solid, just rusty as hell).

Got the exhaust done yesterday, at least with the wire brush and rust converter. Still have to put some high-temp paint on it, but there are 3 coats of rust converter curing as we speak.
You must be registered for see images attach


Discovered that the rear diff cover's leaking. Good thing replacing it and changing the fluid was already on the list...
You must be registered for see images attach
 

Leeann

Full Access Member
Joined
Mar 9, 2013
Messages
2,438
Reaction score
246
Location
Maryland
Got the exhaust paint on the y-pipe and the grill paint (slightly lower temp) on the muffler and tailpipe.

You must be registered for see images attach


You must be registered for see images attach


You must be registered for see images attach


You must be registered for see images attach
 

Leeann

Full Access Member
Joined
Mar 9, 2013
Messages
2,438
Reaction score
246
Location
Maryland
Changed the spark plugs, cleaned the throttle blade and bore, cleaned the IAC and bore, reinstalled all electrical connectors with dielectric grease, replaced the PCV valve and air filter.

Do you think it was time?
You must be registered for see images attach


You must be registered for see images attach
 

Leeann

Full Access Member
Joined
Mar 9, 2013
Messages
2,438
Reaction score
246
Location
Maryland
Replaced the rear diff cover and filled 'er up.

You must be registered for see images attach


You must be registered for see images attach


You must be registered for see images attach


You must be registered for see images attach


Found the receipt and the rear diff oil was changed at Pep Boys. Doesn't look like they even attempted to clean off the factory red/copper RTV before applying a massive bead of blue RTV. Not sure they even cleaned the old oil off the bottom first....and the bottom 2 bolts were barely finger tight. No wonder it was leaking. The oil was clear, though.
 

Leeann

Full Access Member
Joined
Mar 9, 2013
Messages
2,438
Reaction score
246
Location
Maryland
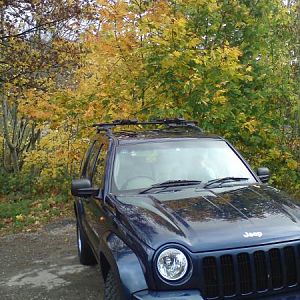
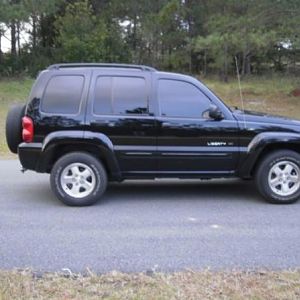
Went over to visit the BIL and FIL today. Turns out the BIL just got an '03 Limited from their cousin cheap (navy blue).

Came home to find this on my back step
You must be registered for see images attach
 

Leeann

Full Access Member
Joined
Mar 9, 2013
Messages
2,438
Reaction score
246
Location
Maryland
Installed the new hitch and wiring harness.

You must be registered for see images attach


You must be registered for see images attach


And installed the LED backup lights.
 

Leeann

Full Access Member
Joined
Mar 9, 2013
Messages
2,438
Reaction score
246
Location
Maryland
Bought a used ****** with 50,000 miles on it and a (small) warranty. The Jeep had been rear-ended and the fluid was nice and red.

Pics of the ****** in the Astro:
You must be registered for see images attach


You must be registered for see images attach


You must be registered for see images attach
 

Leeann

Full Access Member
Joined
Mar 9, 2013
Messages
2,438
Reaction score
246
Location
Maryland
Got started on putting the 'new' transmission in place. First, we had to pull the transmission cooler and clean it out. Couldn't run the cleaner through the lines to clean it as the cleaner wouldn't get up to the top pipes that way.

Cooler out:
You must be registered for see images attach


Crap from the cooler:
You must be registered for see images attach


Then we flushed each line and poured off the yucky fluid:
You must be registered for see images attach


You must be registered for see images attach


You must be registered for see images attach


I didn't take a picture, but we poured the fluiid through a coffee filter and it was full of aluminum.

Then we put the cooler back in place and reconnected the lines. Next up, figuring out how to get the ****** back under the Jeep, then up onto the ****** jack. I don't have the Jeep flying high enough to slide it under on the jack.

In my Astro:
You must be registered for see images attach


Torque converter secured for transport:
You must be registered for see images attach


One step up on blocks towards getting it high enough to slide the ****** jack underneath. Didn't take pics at further steps because my hands were a bit busy.
You must be registered for see images attach


On and secured to the ****** jack:
You must be registered for see images attach


This is where it started pouring, so we were done for the day. Had to take two longish breaks during all this to take the kid to girl scouts, then pick her back up.

Tomorrow after work, we'll get it lined up and bolted back to the engine. Then I'll peck away at getting everything hooked back up after work for the rest of the week. Just got new input and output speed sensors in Friday's mail; looks like a good thing I did.
 

Leeann

Full Access Member
Joined
Mar 9, 2013
Messages
2,438
Reaction score
246
Location
Maryland
Got the bellhousing bolted up to the motor, the dipstick tube bolted in place, vent hose stuck on its tube, starter connected and bolted up.

Starter and heat shield:
You must be registered for see images attach


Back a little, behhousing bolted up:
You must be registered for see images attach


Yup, I'll be swapping pans:
You must be registered for see images attach


Tomorrow, bolt the torque converter to the flywheel, bolt the inspection cover/reinforcing collar in place, connect the cooler lines, drop the pan and install new filter then install pan from old ******, connect the electrical connections and the shift cable.

That probably will take me to dark, so transfer case, ****** crossmember, y-pipe and driveshafts will wait for Thurs evening.
 

Leeann

Full Access Member
Joined
Mar 9, 2013
Messages
2,438
Reaction score
246
Location
Maryland
Bolted up the torque converter
You must be registered for see images attach


Then the inspection cover/reinforcing collar
You must be registered for see images attach


Next, the cooler lines
You must be registered for see images attach


Then electrical connections and the shift cable
You must be registered for see images attach


You must be registered for see images attach


Had to work a little late and I was tired and in need of beer, so I stopped there. The pan/filter will wait for tomorrow ;)
 

Leeann

Full Access Member
Joined
Mar 9, 2013
Messages
2,438
Reaction score
246
Location
Maryland
Got the Jeep reassembled and moving under its own power - mostly. Have to take apart the right rear wheel as either the discs or the shoes are seized. Unsurprising because it has been sitting for over a year and a half.

Pan (before I put magnet back) with drain plug installed
You must be registered for see images attach


Mopar filter and o-ring installed
You must be registered for see images attach


Pan installed & rtv curing
You must be registered for see images attach


Transfer case bolted up
You must be registered for see images attach


New transfer case position sensor in and hooked up - old was gritty and crunchy and lied to the gauge cluster
You must be registered for see images attach


Transfer case cable hooked up
You must be registered for see images attach


Rear driveshaft installed - and you can just see the muffler to y-pipe flange is bolted up
You must be registered for see images attach


Diff end, front driveshaft
You must be registered for see images attach


Transfer case end
You must be registered for see images attach


New front oxygen sensors, oldish rear oxygen sensors hooked up. Filled the transfer case before I put it up with the ****** jack - much easier. Put 3 qts in the ******, then filled as needed to full - took 9 qts. Will re-check again. Haven't put it back on the ground because of the rear brake issue; will as soon as that's clear. I don't want to drive it around the yard except to get it to the driveway because of the quick learn thing. Don't want to burn this one up...
 

Leeann

Full Access Member
Joined
Mar 9, 2013
Messages
2,438
Reaction score
246
Location
Maryland
Put the 'new' cargo cover in place - now guns & ammo will be under cover ;)

You must be registered for see images attach
 

Leeann

Full Access Member
Joined
Mar 9, 2013
Messages
2,438
Reaction score
246
Location
Maryland
Drove it around in the yard for the first time :rockit:

Have to re-bolt the y-pipe to muffler flange and hope that seals it up as there's a bit of a leak there. Have to bleed the brakes as the pedal's a bit unresponsive and have to replace the rear rotors and pads (might have to do the front too). I warmed it up and ran it through the gears so I could check the fluid level first and it was perfect. Went right into gear, no slush, engine flare or clunk.

Then it's ready (I hope) to switch the title over, get inspection tags and get it MD inspected and full 2-year stickers. Phew ;)
 

Leeann

Full Access Member
Joined
Mar 9, 2013
Messages
2,438
Reaction score
246
Location
Maryland
Fixed the hard braking issue - vacuum line to brake booster was detached. Brakes are now perfect.

Tightened up the y-pipe to muffler flange the bf swore he tightened (yeah….NOT), then vacuumed it out again while I let it run with the AC on.

Smooth, quiet, good AC….next stop, inspection tags.
 

Leeann

Full Access Member
Joined
Mar 9, 2013
Messages
2,438
Reaction score
246
Location
Maryland
Washed the tree crap off, cleaned the windows. Have to figure out how to get the pine sap (from my friend's untreated garage roof) off the paint without damaging the clearcoat...

You must be registered for see images attach


So I got a suggestion on another forum, researched and tried it. Holy cow....rubbing alcohol dissolves it and doesn't damage the paint. I might not be able to lift my arms later, but....

Went from this (and only half washed here)
You must be registered for see images attach


To this
You must be registered for see images attach


The whole hood, front half of the roof and the front fenders all looked like image 1 to start with. Oh, and that's the reflection of my trees and the sky in image 2 -'the paint's perfect except for the rock chip to the left of Jeep (and I have touchup paint for that).
 

Leeann

Full Access Member
Joined
Mar 9, 2013
Messages
2,438
Reaction score
246
Location
Maryland
Insured it :cheers:

Next step: title work and inspection tags (real tags, 1 month stickers). Then inspection and, hopefully, 2 yr stickers.

Title work and inspection tags done.

DROVE IT!!!!!!

:driver::head3::friday::dogpile:
 

Leeann

Full Access Member
Joined
Mar 9, 2013
Messages
2,438
Reaction score
246
Location
Maryland
Drove it again! And my boss had the wash dude at the shop next door wash it, vacuum it, hand wax and buff it.

Scheduled the recall work (rear lower control arms) for Monday. They're going to cut & program my second key fob/key while it's there.

Oh, and the front Husky liners came in so I installed those.
 

Latest posts

Members online

Top