UPDATE:
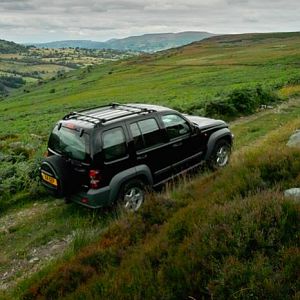
I ordered a set of roof rails and cross bars from Rocky Road. It took a couple of weeks for the assembly to ship but I was in no particular hurry. When the components did arrive they were well-packed and damage-free. There was one thing I did notice that appeared odd to me. The forward portion of each rear "foot" of the roof rails were angled upward to a degree that would have made it difficult to engage the roof-mounted studs. A quick call to RRO confirmed that this was probably due to welding heat. The rep apologized that they missed this and offered to take the rails back and repair or replace. He also explained that the proper application of torque with the feet in a padded vice would do the trick also.
It did. Very easily.
With that done, fit and finish of the components were sensibly perfect. On to prep and assembly.
For those of you with factory rails, count your blessings. Installation would be that much easier. For those of you with those long plastic rails sitting flush on your vehicle, you've got your work cut out for you. Removing those flush rails was a simple matter of pulling and prying up and away from the roof of the vehicle. What you are left with, however, is mass of broken double-sided tape and stubborn adhesive running the length of the rails. Removing this ugly mess is, unquestionably, the most difficult routine in this installation. What is required is a plastic putty knife/scraper, patience, and generous amounts of Goof-Off.
Once this was accomplished. Installation was simple and straight-forward, hardly requiring instruction. All hardware was present and accounted for. Everything fit together as it should. I recommend snugging down the roof rails but do not torque them down until the end. The long cross-bar goes up front and the short one in the back. "Finger-tight" two brackets to one side of the vehicle. Take the other brackets and attach the cross bars to them. Then feed these into the "finger-tighted" brackets while a friend supports them. Tighten the cross-bar/bracket assemblies in place. Then torque down the roof rails. Lastly secure the cross-bars in their respective brackets with the supplied hardware.
I hope that all makes sense. The end result is a very robust set of racks that will handle any load I am likely to throw on there. I can't wait to throw the canoe up there. It's that time of year!
Cheers,
Chris


