Alright here we go...
When I started to design my bumper I wanted four things:
-Have a safe and reliable bumper
-Keep cost low
-Keep it lightweight
-Not look like a 9 yr old welded scrap together
With these in mind I started looking through Google images for ideas. Found two examples I liked that were similar yet had different angles.
I wanted to try and mix the two together for my own unique design. In the end I think it looks similar to what can be found on Google images but still one of a kind.
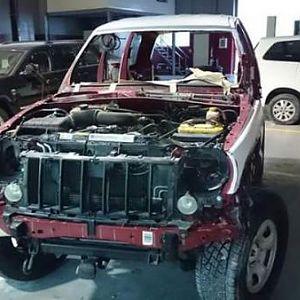
I started by removed all the plastic in front including the turn signals.
I then removed my grill cover but left its frame work in place.
You must be registered for see images attach
Cut the factory fog lights out of my grill so the bumper has more mass in the center and not so wide looking.
Put grill cover back in place.
Using my 4.5" grinder I opened the inner frame rails (the squarish holes on the cross member) and cleaned the edges so that a square tube section would fit nicely inside.
I then started making some mock ups with cardboard so get ideas flowing.
You must be registered for see images attach
Once I had some shapes I liked, I started to design the mount. Just square tubing with 1/4 plate welded to the bottom so when it's inserted it will sandwich the cross member. Then I welded the two square tubes that were now protruding from crossmember together with a section of 1/4 thick 1.5 round tube.
I then started to consider front end impacts. With a unibody KJ I imagine that if the front bumper is too strong, an impact would total the jeep due to bending the underside or frame channel. So I made a gusset with 3/16" diamond plate that separates the square tubing from the face of the bumper, in hopes that this will be a point of relief for the forces applied to my KJ. (Maybe the gusset will buckle or split I'm not sure...it was a theory)
With the plan for the gusset in place I start transferring the cardboard pieces to 1/8 steel 4x8 sheet. Started with the front face and lower edge. Then made sure the two side "wings" that meet the headlight and grill were even. Test fitted and made minor adjustments.
You must be registered for see images attach
I did all my bends by grinding a very small channel into the steel and then either bending it by having weight on a cinder block with the steel pinched between two of them. And I jump or pound on the steel to bend it. Trust me it was a huge hassle, but got her done nonetheless.
After I had the outer bumper tack welded together I tested the mounts to be sure they fit properly.
You must be registered for see images attach
Then I removed the bumper and bolted it to some blocks I have bolted to my garage floor (don't tell my leasing company ) to use as a jig to be sure that the bumper didnt warp or move while finish welding.
Once I finished all the interior welds I went ahead and welded the seams on the outside too.
Then ground it down to a nice shape and finish. I filled any little pinholes in the weld that grinding revealed.
When I welded the diamond plating to the mounting bars I double passed all the connecting points and laid some angle iron corner prices to use as braces in all the corners. I could have made larger gussets to fill the inner frame work but again I wanted it light and also,hopefully, able to crumple a bit in a collision.
You must be registered for see images attach
I drilled the holes to mount my bolt on shackles then made some 1/2 plates as washers and mounted them with G8 bolts. Then I welded them... And double passed them
You must be registered for see images attach
Used a cordless drill and a hole saw bit to make my air holes in the lowest panel. Next bumper I will drill those holes in the plate withe my drill press then weld it to the bumper so I'm not having a harder time than necessary. I would have loved a hydraulic press so the holes would look more professional but whatever it works.
Cleaned the bumper and prepped for paint. I used self etching primer inside and out. Then I used a satin black Rust-Oleum. Waited 2 hours. Sprayed a light spatter of duplicolor bed armor (the older stuff that was super chunky) and after that dried over night I rubbed a slightly damp sponge over it to knock any loose pieces off.
My last coating was a Rust-Oleum bedlined textured spray.
You must be registered for see images attach
It comes out like regular spray paint (maybe just a touch lighter) and has a texture very close to powder coating.
I then drilled my 3/8 holes in the face of the bumper to install my turn signals. I just used a set of clearance/market lights that truckers use for the sides of their trailers (kinda looks like the raptor style Amber lights in the grill). Three on each side. Wired them to my original turn signal harness using the original plug. I just cut the old one off the turn signals and wired them to my new circuit with waterproof heat shrink soldered terminals. This way I can unplug them and remove the bumper easy. I haven't wired my led bar yet as I'm waiting for my other lights to come in and wiring them all at the same time.
You must be registered for see images attach
Ordered a set of red shackles and I have a sheet of honeycomb steel that I'm making a grill mesh with and painting it to match my shackles. Grill cover will be bedlined to match bumper.
The tools I used were:
corded 4.5" grinder
110amp harbor freight flux core welder
Various wheels for grinding cutting and cleaning
Wire strippers
Heat gun
Close up of a weld. Remember it's gasless and running on a regular household outlet (not even the full 110 amp) oh and it's a HF brand welder
You must be registered for see images attach
Could definitely be neater stacks. But I'm happy with them.
All I have into the bumper is:
$100 in scrap metal
$50 in lights
$30 in coating
Like 10$ in mounting hardware
So less than $200 and I think I have a decent enough bumper.


