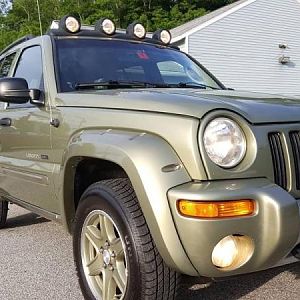
ElecTape's Deep Beryl Green Build Thread

Disclaimer: Links on this page pointing to Amazon, eBay and other sites may include affiliate code. If you click them and make a purchase, we may earn a small commission.

ElecTape

Member
Joined
Nov 3, 2020
Messages
49
Reaction score
25
With the seat skins washed and clean I can now reassemble my two front seats and add my seat heaters.

You must be registered for see images attach

Started with one of the seat backs.
You must be registered for see images attach

Back together. Now for the bottom.
You must be registered for see images attach

Add the cover.
You must be registered for see images attach

Then its time to assemble the seat and add the wiring for the seat heaters.
You must be registered for see images attach

All nice and tidy.
You must be registered for see images attach

Both seats ready to reinstall tomorrow. Now to clean the rear seat.
 

lfhoward

Wheel. Repair. Repeat.
KJ Supporting Member
Joined
Dec 9, 2012
Messages
2,449
Reaction score
2,711
Location
Philadelphia, PA
Thanks!

The Dash isn't all that hard if you take your time and be patient. I'd suggest taking pictures along the way and marking screws.

Just think of all the money you save doing it yourself too.
So true, both about taking your time and saving gobs of money. Taking lots of pictures helps, as does labeling wiring pigtails, and taping screws to the parts they go with. I did mine two summers ago. If anyone needs a KK version of the dash disassemble / heater core, here it is: http://www.lostjeeps.com/forum/phpBB3/viewtopic.php?f=104&t=82363
 

cjw3cma

Member
Joined
Oct 30, 2020
Messages
43
Reaction score
17
Location
Chiloquin, OR
Very intreated in the hood wrap you did / it is just what I am wanting to do. How did you measure for that look? Do you have the pre-install measurements?
 

ElecTape

Member
Joined
Nov 3, 2020
Messages
49
Reaction score
25
I did not precut the vinyl for hood wrap. It's actually quite easy to do.

You'll need some knifeless cutting tape.

Clean your surface where you'll be wrapping, and apply the knifeless tape in your design, make sure the knifeless tape is sticks out so you can start it. Also if you are not going to wrap over the edge of the hood you'll need to overlap your knifeless tape to finish your cut. Hopefully that makes sense. Once you apply the knifeless line to your pattern you install the wrap over it. When you have the wrap down and finished you pull the knifeless line and it cuts your pattern out. Then you just heat the edges and reapply.

I'm sure there are a ton of videos on it out there. It's pretty easy.
 

cjw3cma

Member
Joined
Oct 30, 2020
Messages
43
Reaction score
17
Location
Chiloquin, OR
I did not precut the vinyl for hood wrap. It's actually quite easy to do.

You'll need some knifeless cutting tape.

Clean your surface where you'll be wrapping, and apply the knifeless tape in your design, make sure the knifeless tape is sticks out so you can start it. Also if you are not going to wrap over the edge of the hood you'll need to overlap your knifeless tape to finish your cut. Hopefully that makes sense. Once you apply the knifeless line to your pattern you install the wrap over it. When you have the wrap down and finished you pull the knifeless line and it cuts your pattern out. Then you just heat the edges and reapply.

I'm sure there are a ton of videos on it out there. It's pretty easy.

How COOL is that. Wondering how you did the custom fit with such clean lines. Being that I am 72 years old, I think I will get someone to do this for us.
 

ElecTape

Member
Joined
Nov 3, 2020
Messages
49
Reaction score
25
How COOL is that. Wondering how you did the custom fit with such clean lines. Being that I am 72 years old, I think I will get someone to do this for us.
I just followed the body lines on the hood, pretty easy.

Thanks though for the compliments.
 
Top