Free ninety nine.

Disclaimer: Links on this page pointing to Amazon, eBay and other sites may include affiliate code. If you click them and make a purchase, we may earn a small commission.

Selahdoor

How can I help you or make you smile?
Joined
Aug 16, 2022
Messages
14
Reaction score
15
Location
Snohomish county Washington
That is my favorite price for fixin what needs fixin. This thread will mostly be about things I do to fix what needs fixing, for a cheap as possible. I'll kludge. I'll reverse engineer. I'll even make parts myself, if I need to.

I won't be posting beauty pics. My vehicle has to earn it's keep, and I don't really care that much about how it looks.

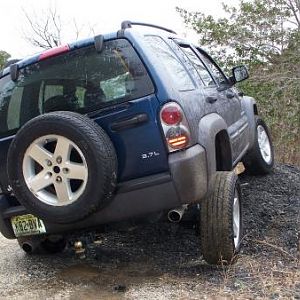
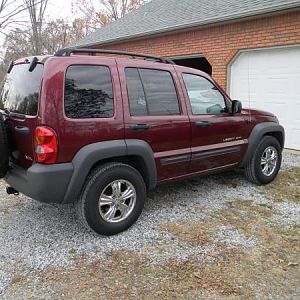
I've owned a 2004 liberty for about a month now. Been able to drive it for about two weeks. Been fixing anything I am able to fix. It needed a lot of maintenance.


Here it is, still sitting in the driveway of the farm from where I bought it.
You must be registered for see images attach


To get it home, I had to get it started. Turn the key, and everything worked, but it just seemed like maybe the key was not turning far enough. It just wouldn't start.

I'm sorry, I didn't get any pictures of this fix. I was just concentrated on getting the vehicle home to my place.

Started the research for a cause. As I said, everything seemed to be working. I located the starter relay and removed it. Then jumpered the correct points, and she started right up. That told me there was nothing wrong with the starter, or the rest of the systems involved in starting. Probably an ignition switch problem.

I looked online for anything pertaining to that. Found that the most common problem with this was the pin inside the steering column that breaks. So, I took the column apart and pulled the ignition switch itself, to check it out. There was nothing wrong with the pin. But I noticed as I was removing it that the connector didn't seem to be on the switch very good.

So I removed the connector and inspected. All looked good. I reinstalled the connector. Wiggling it around and pushing it on as hard as I could. Got a good solid connection. Then turned it with a screwdriver. It would start maybe one time out of about twenty tries. So the problem seemed to be in the switch itself. I ordered a new switch.

But I still had to get it home. Jumpering the relay points was still working to get it started, but I didn't want to run wires all the way up into the cab, to keep doing that. So I sussed out the wiring for the switch at the column. I reckoned that if I jumpered the red and the yellow wires at the back of the switch connector, I could do the same as jumpering the starter relay. I was correct. So, I manufactured a couple jumpers from paper clips, wired them up, shoved them in the back of the connector, and tied everything in place. Then ran the wires to a cheap momentary on switch. Put the column all back together and let the switch hang outside it. Now, I could turn the key all the way on. Then hit that momentary on switch, and it would start every single time.

Satisfied that it was reliable enough to take a chance with, I started it and drove it home.
 

Selahdoor

How can I help you or make you smile?
Joined
Aug 16, 2022
Messages
14
Reaction score
15
Location
Snohomish county Washington
When the switch came in, I replaced it and sure enough, it fixed the problem. That's all it took. Not free, but not costly, either. And the temporary fix WAS free, and got me home. Probably would have gone on being just fine for years. But was cheap enough, to do right, so why not? I left the momentary switch in there, just because. LOL


The next problem I needed to deal with was the taillights.
Right turn wasn't working, and on the driver's side nothing was working.

Got them both off and figured out the problems.The turn signal was because the bulb needed replaced. But that light housing was also full of water for some reason. The driver's sdie was dry, but was broken, so water was just draining right out.
You must be registered for see images attach

You can see the left is broken, and on the right, you can still see some water in the corner, even after I had gotten as much water out of there as I could.

I took care of the right light by drilling two drain holes in the bottom. One right in that corner.
You must be registered for see images attach

On the wet side, two of the bulb sockets were pretty badly burned. The third only browned a bit. I'm assuming that was because of all the water that was in the housing. Constantly being bounced and sloshed around. Creating shorts and losing them, then creating them again.
You must be registered for see images attach

I replaced the bad bulb on that side, drilled the drain holes, made sure the housing was comletely dry. Then called it good and reinstalled it.
 

Selahdoor

How can I help you or make you smile?
Joined
Aug 16, 2022
Messages
14
Reaction score
15
Location
Snohomish county Washington
On the drivers side, as I said, the housing was broken. But the damage was a lot more than that broken corner you can see. A couple other things were wrong with it.

First of all, there is something that I think is common with these early 2000 liberty driver's tail lights. There is a piece of plastic inside the housing that breaks off, and then ends up laying right on top of the top bulb. It gets hot, and causes damage to the socket, to the bulb, and to the housing, especially where the socket makes it's electrical connection. I didn't get any pictures of that loose 'shield' or whatever it was, inside the housing but using a couple pairs of needle nose pliers, and some screwdrivers, I was able to get that piece all broken up and taken out of there. This is what didn't get lost during the process. It was a fairly big piece of plastic. The cloudy bits are what was right up against the bulb.
You must be registered for see images attach

These are the bulbs from that housing. Again, two bulbs were ok, and one was bad. But this time, it was the top bulb that was bad. The bulb itself was broken by the heat it underwent.

That entire socket has been replaced already. The seal on it is a different color from all the others. It's too bad that the previous owner didn't take the time to suss out what the real problem was, instead of just replacing that socket.
You must be registered for see images attach
 

Selahdoor

How can I help you or make you smile?
Joined
Aug 16, 2022
Messages
14
Reaction score
15
Location
Snohomish county Washington
With that fixed, the assembly still was not working.

I had a look at the connection points in the housing, for the sockets. On the top one, the heat had gotten so bad that it had melted the metal connection point, right into the housing plastic. Here is a good socket connection point compared to the bad one. I have a red arrow pointing out where the metal piece melted its way into the plastic housing.
You must be registered for see images attach

Instead of trying to mess with the socket and making it's connector point reach further down, to try to make contact, I decided to fix the connector point on the housing, instead. I first of all, dug the metal contact up out of the housing. Used an exacto knife, and some careful surgery, to get the contact unburied, and pulled up. Then I got out a blue spade connector, and cut the spade part off of it. (It is almost exactly the same size.) Then I pried that up underneath the connector, and left it there. That raised that connector to the correct height. (I did move it further in, after I took the pic, and further away from the other contact. I didn't leave it sitting that way. I just didn't want to take another pic.)
You must be registered for see images attach

Now, once the sockets were all plugged back in, with all new bulbs, everything worked.

Still had one more problem with that light assembly.
 

Selahdoor

How can I help you or make you smile?
Joined
Aug 16, 2022
Messages
14
Reaction score
15
Location
Snohomish county Washington
The damage to the driver's side tailight was obviously from an accident. Well, that damage extended to the screw in 'nipple' pieces that get shoved into the holes in the body of the vehicle. Those got broken off, along with a good bit of the plastic. Here is a pic of the good ones on the right, and the previous owner's attempt to 'fix' the problem. He whittled down a pencil, broke it in half, and glued and duct taped the two halves into place where the metal pieces had been.. This did not work, of course. (At the time of the pic, I had already removed the top one, to inspect how he had done what he did.)
You must be registered for see images attach

I cast around for a better solution. First of all, I noticed that even though a large portion of the supporting plastic had been broken off of both spots, the hole that the black metal pieces screw into, went even further down. So if I could find a screw of the right size and length, I might be able to 'driveway engineer' some kind of better fix... I found the following screws that did fit in those holes correctly, and that were long enough for the job. Here is his fix at the top, compared to the correct metal piece, and my screws at the bottom compared to the same metal piece. Note: The top screw is unmolested. The bottom screw shows the driveway 'machining' I had to do to it's head, to make it work in place of the factory piece.
You must be registered for see images attach

And now, here are those screws put in place, at the right height. They are surprisingly solid, and once reinstalled the assembly is solid as a rock.
You must be registered for see images attach


That fixed the taillights.
 

Selahdoor

How can I help you or make you smile?
Joined
Aug 16, 2022
Messages
14
Reaction score
15
Location
Snohomish county Washington
Next up, the hand brake was really bothering me. I could pull it as far up as it could possibly go, and it had zero effect. Just wasn't doing anything at all.

I hoped I'd be able to do as I have done with other vehicles, and just adjust the cables at the handle. Researched all over the net for days, only to find everyone saying that it was not possible. That I had to adjust the brakes at the wheels.

In my driveway, that is a dangerous undertaking. I have already jacked this thing up, once, to change a wheel. It slips and slides and rolls like mad, because the driveway is gravel, and is almost 20 degrees of slope on the 'flat' spot. LOL (And now you can also understand more of why I want that brake to work.)

Well, I am not one to give up easily. So, I undertook to remove the center console, and get down to the brake handle assembly.

To get the console off, you have to put the trans in neutral, put the 4wd in low, then you can put the trans back in park. Remove the bezel for the shifter and the boot for the 4wd lever. (They both easily just pry right up. Then snap back in place when you are finished.) Under those you will find one screw each. (Again, this is a 2004 liberty sport. Cheapest base-est model available.) Then take the 3 screws out of the lid to the middle bin. Leaving the hinge on the lid, not the bin. Then two screws in the bottom of that bin. Then the two screws in the front of that bin. Pry the bin up out of there. Disconnect the wiring from the window switches in front, and the two switches in the back of that space. Once those are disconnected you should be able to just lift up on the rear of the console, and maneuver it up over the two handles in the front. Now you can see the brake handle in all it's glory.

These two pics show the handle, and more importantly, a tang on a spring, that I am going to be referring to. Tang is indicated by the red arrow. First, closer up, then, from further away.
You must be registered for see images attach

You must be registered for see images attach


Now, a pic to give an indication of where this all starts. This is a pic of the assembly, inlcuding the clutch barrel that is wrapped in the spring that that aformentioned tang is a part of. You can see where the end of the single cable is located. Pretty much in the center of the picture. I took this pic a bit into the progress already, so I drew a rectangle, where that cable end originally was, when I started all this.
You must be registered for see images attach
 

Selahdoor

How can I help you or make you smile?
Joined
Aug 16, 2022
Messages
14
Reaction score
15
Location
Snohomish county Washington
Now what I did was to install a ratchet strap, with one end hooked through the bar where the three cables meet. And the other end through a steel bracket toward the front of the vehicle.
You must be registered for see images attach

You must be registered for see images attach


I pulled the handle up as far as it would go. Then I ratcheted the strap tight. I then grabbed that tang on the spring in the front, and I pulled it toward the front of the vehicle. Then I let the handle down. Leaving the strap tight.

With the handle down, I once again pulled it up as far as I could. Ratcheted the strap tight again. Pulled that tang again. Then let the handle down again.


I'm sorry. It was late, and I was tired. I gave the sequence incorrectly. I hope that didn't mess anyone up.

The correct sequence was to pull the handle up as tight as it would go. Then tighten the ratchet strap to hold the 'two cables bar' in place. Then let the handle down. Then pull on the tab of the spring. This is a full sequence. The brake handle has to be back down, when you pull that spring tab.

What this does is it pulls the two cables bar further forward. Holds that in place with the ratchet strap. Then when you put the handle back down, and pull on that spring tab, it re-positions the 'clutch spring' on the barrel of the handle assembly. Each time you go through the sequence again, the single cable ends up a bit further back, on the top.

I did this several times. When I was finished, that cable end that I showed earlier, was pretty far back, and when I pull on the handle, it will only go as far as maybe three notches and can't go any further.

Here is what it looks like now.
You must be registered for see images attach

Re-assembly of the console is the opposite of dis-assembly.

That did not cure the problem. Now you can pull the handle almost halfway up, and it won't go any further, but it is still having almost no affect. So, yup. Those brakes will have to be adjusted.

But wait a minnit! I found where someone, (Maybe here), said that you can adjust them by letting it roll backwards really slow, and slowly pulling up the brake handle. Well, I went out and did just that, many times. At first it didn't seem to make any difference. But I didn't give up. Kept trying. And whee-doggy! it actually worked. It apparently is almost unnoticeable how much it adjusts each time... It is now tight enough to hold the vehicle on a mild slope. As long as it isn't in drive or reverse.

But it is obvious that I probably need to replace the parking brake shoes. I'll do that when I can afford it. Until then, it works a lot better than it did. And almost everything so far, has been done for the low low price of free ninety nine!
 
Last edited:

Selahdoor

How can I help you or make you smile?
Joined
Aug 16, 2022
Messages
14
Reaction score
15
Location
Snohomish county Washington
Next up, I need some recovery points on this thing.

There is nothing at all on this vehicle for recovery points. I need some in case I get stuck in mud or snow. But I use them much more often... to anchor the vehicle to a tree, while doing any work, in my driveway.

I don't want to damage any suspension parts or anything else, trying to find a recovery/anchor point on it.

I wish I could afford trailer hitches front and rear. Neither of those will be in the budget for quite a long time.

So what I am thinking about doing is to bolt a piece of chain to the frame. One piece in the front, and one in the rear. Where a hitch would be bolted in. Use two bolts, in separate links, and let a few links of chain hang down a bit when done. A place to hook a chain or a shackle or whatever...

I'll try to take some pics when I get around to doing that.
 

klc

“It flies like a truck.”
KJ Supporting Member
Joined
Jan 14, 2022
Messages
708
Reaction score
998
Location
PNW
There are recovery hooks still available. I installed the the front pair on mine in the spring. You do have to remove the front fascia to get to the mounts. There’s a single hook for the rear, I think it uses some of the trailer hitch attachment points.
 

Selahdoor

How can I help you or make you smile?
Joined
Aug 16, 2022
Messages
14
Reaction score
15
Location
Snohomish county Washington
There are recovery hooks still available. I installed the the front pair on mine in the spring. You do have to remove the front fascia to get to the mounts. There’s a single hook for the rear, I think it uses some of the trailer hitch attachment points.
Thank you. I did already know that. But not even that, is going to be in the budget for quite a while.

This information is matter of fact. It's really no one's business, but it is pertinent to my approach to maintenance of the vehicle, so here goes.

I live on 900 dollars a month. Yes. I do. I don't have any other income of any kind. I just make do. I own my own property, and built my own tiny home. Otherwise I would be living under a railroad bridge somewhere.

That was difficult enough before the inflation hit. Now it is nigh onto impossible.

Hence, my approach of doing everything I possibly can to fix things without spending any money. I'll barter something I have, for what I need. I'll kludge, I'll reverse engineer, or re-engineer if I can, to make something out of nothing, or at least out of what I have to hand.

Tabs title and plates killed any kind of budget for several months. I can't afford hooks, or any other solution. I already have the chains and washers. The four, 12 x 1.75 x 70 bolts that I bought didn't cost more than 6 dollars at lowes.

I prefer a trailer hitch. Both front and rear. Because I can use them for hitches, of course. But also for recovery points, and for jacking points.

So I will be installing my chains for now. Then I will be working on either figuring out a way to build my own trailer hitches, or will be saving up to buy them. Or looking for a way to barter time, labor, parts, or whatever, for them.

Thank you again, for the suggestion. But 'just buy these and bolt them on', will not be a part of my vocabulary for a while. LOL Still good to be made aware of these things, just in case.

I do have to say that even if I had the money in hand, I enjoy the challenge of making something work, using just what I have at hand. I always try that first.

Also, don't confuse the word kludge with krap. If I can't fix something in a strong way that will last, I will replace it if I have to.

The pencils are a good example. They were a flimsy fix. That was a kludge. They wobbled. They didn't actually lock into the connectors on the body of the vehicle. Etc. My fix actually LOOKS flimsy compared to the pencils. But it is very solid. And it does the job in exactly the way the factory parts did.

The pencils were a 'good' solution. Using whatever the person had at hand. It took some thinking. And it worked, mostly, for long enough. Kudos to the guy that did that. I just happened to think of a better solution. :) And that is what I do. I would not have settled for the pencils except to get me down the road far enough to get the right parts. I didn't know about them until I took the tail light assemblies off, to find the problem. If I didn't have a better solution, I would have left them, while I looked for replacement assemblies.

With my fix, I don't need to look for replacements. It's as solid as factory, and everything works. On, to the next project. :)
 

turblediesel

memberable
Joined
May 31, 2015
Messages
3,421
Reaction score
1,159
Location
Alaska
You might be able to get a free rear hitch due to a recall for better gas tank protection. Most recieve the hitch although some just got a hitch frame with no hitch.

Also a recall for free rear lower control arms due to rust problems.
 

profdlp

Fired
Joined
May 21, 2013
Messages
5,837
Reaction score
1,811
Location
Westlake, Ohio
Nice job - and at a great price! ;)

I was one of the lucky ones who got the full hitch added under recall. You might call different dealers, explain that it is a factory recall issue, then ask what exactly they put put on there. All you need is to find the one who will give you the whole thing. I did have to add my own wiring kit for electric hookup. Mine tapped into the tail lights and was very easy to do - and cheap!
 

Selahdoor

How can I help you or make you smile?
Joined
Aug 16, 2022
Messages
14
Reaction score
15
Location
Snohomish county Washington
Installed one chain today. On the rear.

I got to looking at the front. It will be a lot more work, and so I may just wait until I have a trailer hitch to install.

Recovery point in the front. Yeah. No. But I beleive that I can use the sway bar as an anchor point, while doing work in the driveway. There is no yanking involved. Just an anchor to keep it from moving.

As for the rear...

I started to install this chain on the driver's side, due to the exhaust being so close, on the passenger side. Then realized that no matter what, if I have to utilize this thing in an emergency, that rear bumper is going to be damaged. Stepped back, and realized that the drivers side installation would mean there goes the license plate. So, passenger side it is.

Now to begin with, installing a chain is not as straight forward as it might seem. You have opposing links to deal with. Which means, yeah you could just run the bolt through, with washers, but you will mangle the washers when you tighten it down. And over many years of experience bolting chains to vehicles, I have learned that this always leads to trouble if it ever needs to be utilized. The washers will rip out. The chain will become loose, etc. Bolts are also prone to digging new holes in the frame when this happens.

If you can bolt the chain in solid by building up to it from both sides, the entire thing stays more solid, and only about 10% or less of the problems ever occur. Even when jerking the vehicle with it.

So... First I cut some washers. Had a look at them, and decided that I just wasn't comfortable with that. So, I drilled out two 1/2-13 nuts so that my bolts slip right through. Then ground a small angle on opposing edges on them, to let them slip down between the opposing links, and make solid contact with the link to be bolted down.
You must be registered for see images attach


Now, with the bolt, the two slip nuts, and some washers, this is how they capture the link to be bolted solidly down.
You must be registered for see images attach


Now this is what it looks like installed. I bolted it down in two places intentionally. The second bolt will brace it under tension in the first place. But if one breaks loose, the other will catch it.
You must be registered for see images attach


And then I will use an "extra link" type connector, to attach a hook, or strap, or shackle, or whatever, to this chain, when I need it. Here is a pic showing two ways I can connect this extra link to the chain.
You must be registered for see images attach


That extra link is about the largest you can buy. I have had several, for decades. LOL The screw part barely gets through the link on this chain. So, once installed and screwed together, it is as strong as the chain itself, or stronger.

The real downside to this is that there is no doubt the plastic bumper is going to get damaged if this is utilized for a recovery. So this is only on here for emergencies and only until I get a hitch on here.
 

tommudd

Moderator
Staff member
Moderator
Joined
Jul 14, 2005
Messages
22,450
Reaction score
3,652
Location
Southeastern Ohio
Easy repair to the rear bumper, cut the bottom 4 inches or so off
Looks way better with the bottom off, i.e. Mudd Cut rear bumper if looking it up
did this years ago on the 04 until I installed a Rock Lizard rear bumper
 

Selahdoor

How can I help you or make you smile?
Joined
Aug 16, 2022
Messages
14
Reaction score
15
Location
Snohomish county Washington
Thank you! I'll look that up.

It'll be interesting to see what you did with the license plate.

Ok, I found it already. That looks good, but doesn't go anywhere near far enough up.

If you look at the frame where I bolted the chain, had I gone with the driver's side, and hooked a cable to that chain, then someone yanked on the cable, it would rip at least 90% through the license plate. The frame is that high.

I do think that I am just going to leave it be until I see if I can get the free hitch from the gas tank recall. The chain is on there in case of dire emergency. But I do not plan on getting stuck anywhere, in the meantime. LOL
 
Last edited:

Erskine

Full Access Member
Joined
Aug 2, 2022
Messages
129
Reaction score
182
I live on 900 dollars a month. Yes. I do. I don't have any other income of any kind. I just make do. I own my own property, and built my own tiny home.
I live on not much more, in a shepherds hut I built.
Everything needs to earn its keep and that includes the KJ.
Respect.
 

Paddlerdan

New Member
Joined
Oct 28, 2020
Messages
19
Reaction score
8
Same, I live on less than $900 per month. But my house and land is paid for and my '02 Libby is a great winter vehicle, especially on 31" A/T tires. I've got to make every dollar count, myself. No freeloading at my place. I'm grateful to live in a place where I can live on just the Social Security I get. And the Libby is a dream in the snow months. I give myself some fun with an XJ in the summer months, exploring old skidder trails and getting to some out of the way fishing spots. Life is good. Happy Trails, Brother
 
Top