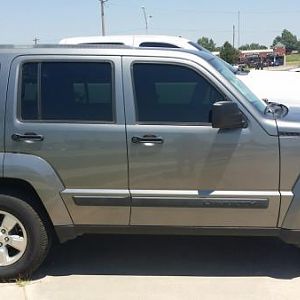
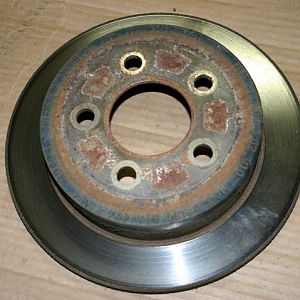
Need to get some undercarriage painted , man thats rusty
You are using an out of date browser. It may not display this or other websites correctly.
You should upgrade or use an alternative browser.
You should upgrade or use an alternative browser.
HOW TO: Purchase & Install a WesWay Lift
- Thread starter blue_kjR417
- Start date
Disclaimer: Links on this page pointing to Amazon, eBay and other sites may include affiliate code. If you click them and make a purchase, we may earn a small commission.
Need to get some undercarriage painted , man thats rusty
Happy now?:icon_lol:
Before
You must be registered for see images attach
You must be registered for see images attach
After
You must be registered for see images attach
You must be registered for see images attach
blue_kjR417
Platinum Renegade
Happy now?:icon_lol:
Before
You must be registered for see images attach
You must be registered for see images attach
After
You must be registered for see images attach
You must be registered for see images attach
probably should've sanded it a little lol
theroofable
Full Access Member
Hey whats the speaker under your hood for?
blue_kjR417
Platinum Renegade
Hey whats the speaker under your hood for?
It's a PA speaker for my CB radio
Jo6pak
Full Access Member
Great tutorial. This is exactly what I'm looking for. For a novice wrench like myself, there is no such thing as too many pics.
Thanks for taking the extra time to snap the photos and post it.
Someone should buy you a beer:happy160:
Thanks for taking the extra time to snap the photos and post it.
Someone should buy you a beer:happy160:
blue_kjR417
Platinum Renegade
Great tutorial. This is exactly what I'm looking for. For a novice wrench like myself, there is no such thing as too many pics.
Thanks for taking the extra time to snap the photos and post it.
Someone should buy you a beer:happy160:
haha no problem glad I could help! I don't drink but I'll settle for a mountain dew lol
Scottm2010
Full Access Member
Thank you so much! This is an EXCELLENT write up!
blue_kjR417
Platinum Renegade
Thank you so much! This is an EXCELLENT write up!
Glad to help, if anything seemed unclear feel free to email or pm me!
Jo6pak
Full Access Member
What is your current measurement from the hub to fender, both front and rear after the lift was installed?
And how many miles were on your OEM suspension before you installed the kit?
And how many miles were on your OEM suspension before you installed the kit?
blue_kjR417
Platinum Renegade
I have no idea, if I get a chance to check I will.
I think I had about 105k
I think I had about 105k
Originally Posted by KornyBrad View Post
2002 KJ Renegade
85k
Front- 18 ½
Back- 18 7/8
All stock for now.
Planning a WesWay lift soon.
--------------------------------------------------------------------------
After lift
Front:
20 1/8 driver
19 7/8 pass
Rear:
20 5/8 driver
20 3/8 pass
Added 3/8" Boiler shim and clevis lift in front, 2 extra isolators in back.
Jo6pak
Full Access Member
Thanks for the info. Do you still have your original springs? Or did you replace them as well?
Thanks for the info. Do you still have your original springs? Or did you replace them as well?
Still original springs. Probably will replace those in the future.
Marlon_JB2
Kombat Edition Jeep
You could, the rear spring isolators are different though, for the KK.Do you know if I could do this to my 08' KK?
Jo6pak
Full Access Member
Did an install of this type of lift today with brand new coils and springs.
Since I was doing a total suspension swap, I had the KJ up on four jack stands with all wheels off.
For the rear, I used the flex inducing method, but I used the OEM scissor-jack on the same points that Weston used the bottle jack. Worked pretty well, still had to coax the new spring into position. Took me about an hour to do the rear by myself.
On the front-right we had to use a coil compressor to get them back in. Didn't want to pop the LBJ. The new coil-overs were just long enough so we couldn't quite fit them. Didn't need much, just enough to line up the clevis.
When we did the left side, we installed the shock before we put in the new UCA, which was much easier.
Once we got it together we used a prybar to adjust the clevis, and a 3/8" hex wrench to measure the spacing.
There may be a better, easier way to do it, but it's what worked well for me. Thought the tips may help others.
blue_kjR417
Platinum Renegade
Did an install of this type of lift today with brand new coils and springs.
Since I was doing a total suspension swap, I had the KJ up on four jack stands with all wheels off.
For the rear, I used the flex inducing method, but I used the OEM scissor-jack on the same points that Weston used the bottle jack. Worked pretty well, still had to coax the new spring into position. Took me about an hour to do the rear by myself.
On the front-right we had to use a coil compressor to get them back in. Didn't want to pop the LBJ. The new coil-overs were just long enough so we couldn't quite fit them. Didn't need much, just enough to line up the clevis.
When we did the left side, we installed the shock before we put in the new UCA, which was much easier.
Once we got it together we used a prybar to adjust the clevis, and a 3/8" hex wrench to measure the spacing.
There may be a better, easier way to do it, but it's what worked well for me. Thought the tips may help others.
Awesome! Glad to hear you got things worked out and new methods are always appreciated! I'll add you to the list of members sporting the WesWay Lift!
yellocoyote
Administrator
Pics? 
Similar threads
- Replies
- 14
- Views
- 2K
- Replies
- 11
- Views
- 2K
- Replies
- 1
- Views
- 732


