Boueux
Active Member
- Joined
- Dec 28, 2023
- Messages
- 121
- Reaction score
- 65
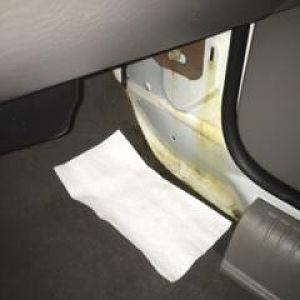
New to us Liberty KJ & we’ve turned into plumbers. As pointed out in other kind comments we see that these skyslider issues often connect to unpleasant electronic & electrical problems as well as the dreaded wet seat & squishy rug of “water in the cabin.” You may find that water has backed up and rained in from the flooded sunroof pan above and that water that isn’t getting down the clogged pillar drains may pour into the front left pillar before starting a carpet cleaning business underfoot, which is why we wanted to jump on this asap and curtail the internal deluge.
Unfortunately, the left front pillar was already soaked, resulting in a drenched interior fuse panel and BCM or Body Control Module. This is known for causing erratic interior lighting and for us, because lights weren’t turning off by themselves, it resulted in battery drain.
Before starting this cleaning detail, do pull both of your battery cables. Why? Well, many vehicles have side curtain airbags and messing around in here takes Milton Bradley ‘Operation’-like deftness, best done when no juice can power them. same rule can be applied to messing with the dash, the fuse boxes, relays etc.
Get hold of the service manual for your model year, there are many links on this and other forums to free manual downloads. Only two examples, there are more if you dig a little.
https://www.jeepkj.com/threads/factory-service-and-parts-manuals.58752/
https://jeep-manual.ru/index.php?page=KJ
PLEASE don’t pull fuses without fully understanding their uses. Removing both battery cables and getting juice out of capacitors can save your life. Serious business.
To get at the sunroof drain lines you’ll need a 7/32 deep socket for the fasteners under the caps on the grab handles on front pillars and some torx bits for the visors and center console. If you don’t have a deep socket, you can very carefully remove material from the inside of the shoulder of the socket access channel without touching the seams where plugs meet handle and you’ll be able to pull the handle, no one will be the wiser and your shallow but too wide 7/32 should reach. At publishing, we’ve only undertaken the drains in the front pillars. Rear may be done at a later date, depending on whether we start parking facing downhill.
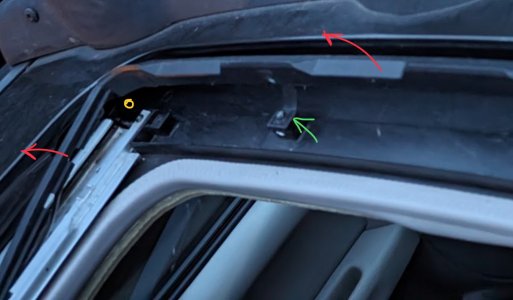
We did this with the sunroof open and undid the two little screws that secure the front member of the leaf spring actuated arm that’s exposed when the roof slides back. You’ll see the two small tabs on the spring arm where they connect to two points just forward of the sunroof opening. Folding this wide square u-shaped member back made it easier to clean up the sunroof track and to remove dreaded gup in each corner up there.
Water that gets into this collection pan that’s surrounding the square hole in the roof is meant to go into the four hard-to-see holes. There’s one in each corner of the body channel surrounding the sunroof and these each lead to the tubular drain lines, but these eventually get clogged by nature‘s evidence.. leaves, twigs, all manner of flotsam causing all wet hell to break loose below.
Since the sunroof‘s mechanical works that are exposed up top when it’s open are going to be greasy and dirty, do try to keep your grimy hands off of the pristine headliner, please. Wet cleaning headliners often works well, but where do you stop? Cleaning leaves a ring around the cleaned area where you stop cleaning, so unless you like carpet cleaning extractors try not to start cleaning and you won’t be making another job for yourself.
To free access above the front corners of the headliner you’ll next carefully pull back the weatherstripping around the top of door and take care not to bend the headliner itself. // CAUTION using any tools here, along the top of each door opening is where the side curtain airbags are located.//
You only need enough headliner dropdown clearance to peer up in there with a bright light, not full exposure. The headliner backing is pliable but it can bend and leave a crease, delicate attention, please. This all ought to expose the drain line connections to the front corners of the pan. The drain lines are each connected to corners of the drain pan with thick rubber tubular connectors that slide forward on drain line to remove.. pay attention their orientation when removing, which end goes where. Make sure to put them back as found later or you’ll really learn what a leak is.
Clean out everything that you can see up there and even what you can’t. Anything loose up top will be carried into the drain opening or drain line eventually, in parts or whole. Think of this as a mobile gutter system, you wouldn’t let the gutters on your home back up and dump rain into your electrical panel repeatedly, wet your walls, furniture, carpet or rot your floor. THIS is a use contributor to the death of many a floor pan. Like home gutter cleaning, this is odious but very necessary required routine maintenance. Left alone, it will not “ go away,” and ignoring it is the quickest way to destroy your vehicle. Certainly something to do to any new-to-you Liberty with a sunroof moonroof star roof or rainroof.
After that you’ll have the drain line in your hand and be able to blow air through it with a conical air compressor tip. before any blowing, you can also try to clean it in place with any of the sunroof drain cleaning tools that are funding Bezos’ yacht. Consider buying the 72” or longer ones and get two sizes.. one we got was a green rubber clad wire and the other was thicker twisted wire. links below..
In ours there’s a fairly rigid yet pliable slick black plastic drain line ( some in YT videos are crumbly and even corrugated) but in 2006 there are two tight bends in the upper end where it snakes between the airbag and visor mount, so it turned out the thinner, rubber clad long pipe cleaner navigated those turns better.. After that we used a turkey baster and some pretty hot water, which seemed to help clear things up.
The bit that still remains unclear here is where the lower end of the front drain lines are routed, we were only ever able to find the top. The interior below dash knee wall cover pops off easily after the weatherstripping is pulled back. these panels are somewhat tinny, best done warm as cold rigid plastic can snap like a dry twig, where warmer plastic tends to bend. The lion hunt through the cable forest behind the drivers left kneewall panel exposed, well, lots of wire, serving the fuse box and BCM, but no drain line in sight. The 2006 schematic from service manual attached here is pretty inscrutable.
You’ll know the line is clear when it glugs audibly and water comes out of the skirting behind the front tire, but use water judiciously at first until you see it emanate under vehicle. You don't want to flood your floor.. our carpet is already W. E. T. enough. Gotta dry that out as soon as possible or mold and then an invitation to rust and electrical issues will follow as there IS plenty of wiring under the rug running everywhere. Hope this initial start helps
More later on rear drains or laziness will denote our new downhill Parking position..
until then, file this under Leak Leaks Leaking Leaky Liberty Sun Sunroof Roof Moonroof Rainroof Rain Raining Rained Drains Drain Draining Draintube Tubes Tube Tubing Clog Clogged Clogging Drip DripsDripping Wet Sopping Carpet Rug Electrical Electronic Soggy Bottom Boys and Girls Repair DIY HowTo How-To Tutorial .O lllllll O.
Attachments
Last edited:


![20210404_132008[1]](/data/xfmg/thumbnail/6/6715-18f749e3eb50a0183a6f5fc04ea242af.jpg?1623784628)


