My Blue KJ

Disclaimer: Links on this page pointing to Amazon, eBay and other sites may include affiliate code. If you click them and make a purchase, we may earn a small commission.

TheBlueKJ

Full Access Member
Joined
Oct 29, 2012
Messages
1,617
Reaction score
9
Location
South Jersey
Replaced the harmonic balancer that was digging into my timing cover and front crank seal since I was in there and it was leaking. Also wire wheeled out all the rust and shop vacced the dirt and debris out.
You must be registered for see images attach

You must be registered for see images attach

You must be registered for see images attach

You must be registered for see images attach

You must be registered for see images attach
You must be registered for see images attach

You must be registered for see images attach

You must be registered for see images attach
 

HoosierJeeper

Gold Supporter/Admin
Staff member
Administrator
Joined
Jan 20, 2009
Messages
20,874
Reaction score
299
Location
Western WI
Oh man my floors were way worse than that...mine literally had no floors left. Just the carpet.

Odd because mine doesn't have door rust or rocker panel rust. The old owners just must have washed the outside and door jambs good but never looked under it.
 

TheBlueKJ

Full Access Member
Joined
Oct 29, 2012
Messages
1,617
Reaction score
9
Location
South Jersey
Mine has none either. Sometimes the floor plugs leak and the carpet gets wet holds the water and rusts out the floors thats what happened to mine it seems as the underside is very rust free


Sent from my iPhone using Tapatalk
 

TheBlueKJ

Full Access Member
Joined
Oct 29, 2012
Messages
1,617
Reaction score
9
Location
South Jersey
Patched up the drivers side holes with panel bonding adhesive and sealed it up some extra motorcraft sealant i had laying around
You must be registered for see images attach

You must be registered for see images attach

You must be registered for see images attach


Sent from my iPhone using Tapatalk
 

TheBlueKJ

Full Access Member
Joined
Oct 29, 2012
Messages
1,617
Reaction score
9
Location
South Jersey
Piss poor photo but here's the passenger side after spraying it after getting patched with rust reformer and epoxy paint
You must be registered for see images attach


Sent from my iPhone using Tapatalk
 

HoosierJeeper

Gold Supporter/Admin
Staff member
Administrator
Joined
Jan 20, 2009
Messages
20,874
Reaction score
299
Location
Western WI
Looks awesome. I did a similar repair on a 74 Grand Prix I had back in the day. I thought my XJ was going to be easy like that, then I got under it and just saw carpet. LOL
 

TheBlueKJ

Full Access Member
Joined
Oct 29, 2012
Messages
1,617
Reaction score
9
Location
South Jersey
Looks awesome. I did a similar repair on a 74 Grand Prix I had back in the day. I thought my XJ was going to be easy like that, then I got under it and just saw carpet. LOL


Oh geeze at that point its better to just buy the floor pans from rockauto lol


Sent from my iPhone using Tapatalk
 

TheBlueKJ

Full Access Member
Joined
Oct 29, 2012
Messages
1,617
Reaction score
9
Location
South Jersey
Ripped out the rest of the interior in preparation for bedlining. Vacuumed out all of the dirt from last wheeling trip. Next step is to fix the rest of the holes and wire wheel the loose rust off then a final vacuum then MEK wipe down and itll be ready for bedlining
You must be registered for see images attach


Sent from my iPhone using Tapatalk
 

TheBlueKJ

Full Access Member
Joined
Oct 29, 2012
Messages
1,617
Reaction score
9
Location
South Jersey
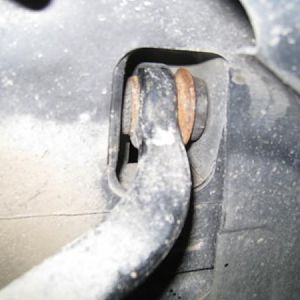
I've been very busy the past couple weeks. Fixed the rest of the holes in the floor, sanded everything down and applied chassis saver. Next step will be monstalining.
You must be registered for see images attach

You must be registered for see images attach

You must be registered for see images attach

You must be registered for see images attach

You must be registered for see images attach
You must be registered for see images attach


Sent from my iPhone using Tapatalk
 

TheBlueKJ

Full Access Member
Joined
Oct 29, 2012
Messages
1,617
Reaction score
9
Location
South Jersey
Replaced both axle seals, wheel bearings, and brake shoes since the drivers seal blew out on the first wheeling trip and coated the drum and almost nonexistent friction material on the shoe so figured it was about time to fix em. The passenger side didn't catastrophically fail like the drivers side but it still was seeping pretty decently so I did that side as well.
You must be registered for see images attach

You must be registered for see images attach

You must be registered for see images attach

You must be registered for see images attach

You must be registered for see images attach


Sent from my iPhone using Tapatalk
 

TheBlueKJ

Full Access Member
Joined
Oct 29, 2012
Messages
1,617
Reaction score
9
Location
South Jersey
They sure are until they destroy the drums! :happy175:
They are centric shoes and were the heavy duty option on rockauto. Only cost $18:icon_razz:
 

ltd02

Comfortably numb
KJ Supporting Member
Joined
Aug 15, 2014
Messages
2,715
Reaction score
245
Location
North Central Maryland
Thought so, I just put them on my truck with new centric drums too. I've used them before and can't beat then for function and price!
 

TheBlueKJ

Full Access Member
Joined
Oct 29, 2012
Messages
1,617
Reaction score
9
Location
South Jersey
In the middle of doing the monstaliner install right now and couldnt be happier with how it's turning out. A few things to keep in mind for people who want to try it on their rig.
1. Lay it on thick keep the roller full at all times as I didnt use enough on the first coat and now i have to do a third since I have leftovers. (Not that im complaining since now I can get the high traffic areas extra thick)
2. VENTILATION. I'm serious this stuff is STRONG. Im doing it outside with all the doors open and I'm still seeing unicorns
3. Buy a third roller. You'll need it.
4. PREP PREP AND THEN PREP SOME MORE. I spent at least 3 weeks prepping it a little bit at a time after work. (The rain on all the days I had free really made the process way longer than it couldve been) Sand and clean everything and I strongly suggest chassis saver as a base coat that stuff is no joke. It seals very well and prevents rust. Make sure you scuff it and acetone wipe everything.
You must be registered for see images attach

You must be registered for see images attach


Sent from my iPhone using Tapatalk
 

TheBlueKJ

Full Access Member
Joined
Oct 29, 2012
Messages
1,617
Reaction score
9
Location
South Jersey
Finished putting the interior back in the jeep over the weekend for the first time in a mo th it's driveable. That's if it would start of course! Go to start it up to give it a drive around the neighborhood and lo and behold the starter is shot. Ah well they dont call it a project for nothing
You must be registered for see images attach

You must be registered for see images attach


Sent from my iPhone using Tapatalk
 

TheBlueKJ

Full Access Member
Joined
Oct 29, 2012
Messages
1,617
Reaction score
9
Location
South Jersey
Put the new starter in and drove it to work this morning. Everything is running a ok. Going to do the pitman shaft seal after work since thats leaking like a sieve


Sent from my iPhone using Tapatalk
 

TheBlueKJ

Full Access Member
Joined
Oct 29, 2012
Messages
1,617
Reaction score
9
Location
South Jersey
Changed the pitman shaft seal and had to take the front driveshaft off to grease it up. That center ling ball yoke is a PITA to grease. The flush zerk wasnt accepting grease so I had to squirt it in around the boot and work it into the joint

And on another note: So if you have an old tired engine, NEVER EVER EVER NEVER put synthetic or synthetic blend in it. IT WILL burn and leak oil faster than you can put it in I learned this the hard way.

You must be registered for see images attach

You must be registered for see images attach

You must be registered for see images attach


Sent from my iPhone using Tapatalk
 

TheBlueKJ

Full Access Member
Joined
Oct 29, 2012
Messages
1,617
Reaction score
9
Location
South Jersey
Boy, has it been a minute. That old XJ in this build thread is long gone. The guy who sold it to me neglected to tell me that the oil rings were shot. I'm not kidding when I say this, it would burn 1qt per 30 miles. I resorted to putting used oil in it just to put put around in it. Sold it for a little less than what I had in it, since at the time I had no where to do the work to fix it.

Of course, now I do have the space, time, and money, to do it I no longer have it. Definitely regret selling it, but alas such is life. Still have the truck and quad, the F150 is still stock for now since I need to be able to fit into parking garages for work unfortunately. Was actually looking at getting another Liberty again, but it looks like a lot of the aftermarket, specifically all of JBA's offerings are gone unfortunately.

I do have a current project that I'm working on. A 1949 Ford 8n that I'm rebuilding from the ground up to use on my property. Just waiting on the engine from the machine shop.
 

TheBlueKJ

Full Access Member
Joined
Oct 29, 2012
Messages
1,617
Reaction score
9
Location
South Jersey
The ford in question when I brought it home.
You must be registered for see images attach

You must be registered for see images attach

You must be registered for see images attach


And in it’s current state.
You must be registered for see images attach

You must be registered for see images attach

You must be registered for see images attach
 
Top