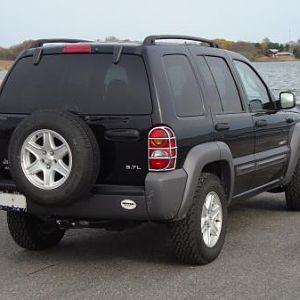
Hec In Omaha
Member
Howdy all!
I decided to start my lift build here instead of continuing on in my other thread regarding scalloped front tires.
Summary from my other post.
I have read a lot of posts regarding people not happy with installing OEM spec springs and shocks. Many experienced significant ride height settling which didn't fix the problems they had with their worn out springs and shocks. In a short time, they were right back where they started. Since the labor is essentially the same using OEM spec or upgraded components, I have decided to go with a mild lift vs. simply replacing parts with OEM spec parts. I will be installing all the components myself.
I was in El Paso, TX over Thanksgiving and dropped in at 4 Wheel Center. This is a very reputable off-road accessory shop.
www.4wheelcenter.com
I explained to the tech what I was considering. This is what we came up with. Install the OME/Bilstein rear shocks, new Spring Insulators, hockey puck bump stops and record the new rear ride height dimension measured from the center of the wheel to the fender opening. The 4 Wheel Center is going to preassemble my OME/Bilstein front shock assemblies. New top mounts and spring isolators will be installed as well. With the rear height measurements, they will ensure the adjustable front shocks are set so that I have a level ride height in front. Then they will ship the assembled front shock assemblies to me so I can install them.
I went ahead and ordered the following:
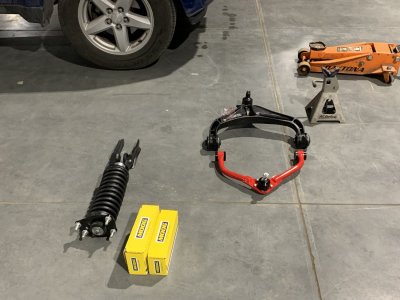
• OME 2926 front springs since I am not adding any steel bumpers, winches etc.
• Bilstein B8 5100 24-282642 front shocks.
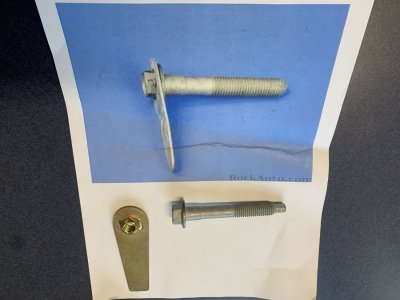
• Two New Mopar Front Clevis 4670456AB (Ebay). Note: I had to also order new pinch bolts and clevis mount bolts and nuts as these are stamped steel clevises and the originals are cast. There is note for to use new hardware if switching from Cast to 'stamped steel clevises. Two New Pinch Bolts 6509430AA. Two New Clevis mounting bolts 6507620AA, Two New Clevis mounting nuts 6102251AA. New clevis hardware ordered from Moparpart.com
• OME 2731 rear springs (EBay)
• Bilstein 24-185660 rear shocks (Amazon )
• JBA-5.5.00.EZ Upper Control Arms (JBA)
• Moog RK622147 Front Right Lower Control Arm (Rock Auto)
• Moog RK622148 Front Left Lower Control Arm (Rock Auto)
• Teraflex 1903200 Front Bump stops (Teraflex)
• 4- Hockey Pucks for rear bump stops. (Amazon)
• Moog K160059 Rear Coil Spring Isolators (Rock Auto)
• Moog ES800412 Right Outer Tie Rod End (Rock Auto)
• Moog ES800413 Left Outer Tie Rod End (Rock Auto)
• Moog K750127 Sway Bar Links (Rock Auto)
Preparation for rear suspension work:
I ordered a piece of Stainless Steel bushing to make two 1-7/8" bushings for the upper mounts of the Bilstein 24-185660 rear shocks. I found a link to this material in a post from jcook79. Thank you jcook79!
https://a.co/d/213iPUg.
I made sure the ends of the bushings where chamfered, so they wouldn't tear up the rubber bushing in the shock during installation. I installed the bushings using a motorcycle piston wrist pin removal tool to pull them into place. Worked slick!
In addition, I drilled 17/64" holes in the center of 4 hockey pucks and then used a 3/4" spade bit to counter sink a hole about 3/8" deep into two of the hockey pucks so that the head of the 1/4" x 20 bolt and washer would sit below the surface of the puck. The 3/4" diameter allows me to use a 7/16 3/8" drive socket no problem.
Yesterday my daughter and I installed the OME 2731 Springs and Bilstein 24-185660 rear shocks along with Hockey Puck Bump Stops and rear new coil spring isolators.
Installation:
* I lifted the rear of the Jeep up so that the suspension was allowed to hang down by placing jack stands just in front of the rear lower control arm front mounts.
*I removed the rear tires, rear shocks, rear coil springs, spring isolators and rear upper bump stops. I also had to remove the rear mounting bolt of the lower rear control arms to help get more articulation of the axle to pull the springs out.
* I drilled and tapped the lower spring perches to accept a Grade 8 - 1/4" x 20 x 2-1/2” long bolt. I figured this would make the hockey puck install Ho easier than trying to install a nut from underneath the spring perch. Tip - Temporarily install a spring isolator pad on the lower spring perch and set one of the pre-drilled pucks in the center of the pad. It will fit perfectly in the opening of the pad. This will let you mark the center of the spring perch for drilling! Worked slick for me!
* Next, I installed the rear springs, reconnected the lower rear control arm bolts, and rear shocks. Tip - I applied anti-seize to the upper shock bolts so they wont rust in the shock bushings. Just an added corrosion preventative measure. Spring compressors would make the new spring installation go much easier. I ended up using a couple of chain clamps on each spring to compress the spring enough to slip it in place.
* Next, I slipped the pucks in between the coils and tightened the Grade 8 - 1/4" x 20 x 2-1/2” bolts down. Red loctite was applied the bolt threads. I also slipped the rear upper bump stops in between the coils and installed them at this time. They pop right in.
* Reinstall the tires and done.
Measurements:
Before New Rear Springs and Shocks. Measurements taken from center of wheel to the bottom of fender opening.
Driver side Front - 17.75"
Driver side Rear - 18.75"
Passenger side Front - 18.25"
Passenger side Rear - 19.25"
After new springs and shocks
Driver side Front - 18.00"
Driver side Rear - 20.75"
Passenger side Front - 18.50"
Passenger side Rear - 21.50"
Quackers rides much better even though we haven't touched the front! The old shocks were pretty worn. My 15 year old daughter could easily collapse them but couldn't collapse the new Bilsteins! Ha ha.
Tomorrow I will call in my measurements to the 4Wheel Center so that they can preset the front shocks to match the ride height of the rear. They should be shipping my assembled front shocks and springs by Tues. One thing is for certain, the front shocks and springs, upper and lower control arms are going to be a bear compared to the rear! Stay tuned!
Hec
Here are some pictures.
Shock and 1-7/8” long bushing
Motorcycle piston wrist pin removal tool
Bushing installed
Spring perch drilled and getting tapped 1/4”x20
Tapped
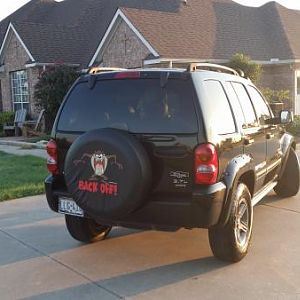
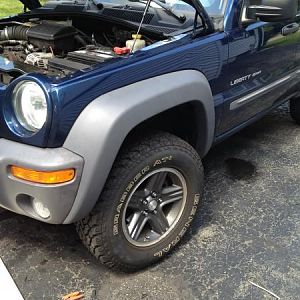
Before
After
I decided to start my lift build here instead of continuing on in my other thread regarding scalloped front tires.
Summary from my other post.
I have read a lot of posts regarding people not happy with installing OEM spec springs and shocks. Many experienced significant ride height settling which didn't fix the problems they had with their worn out springs and shocks. In a short time, they were right back where they started. Since the labor is essentially the same using OEM spec or upgraded components, I have decided to go with a mild lift vs. simply replacing parts with OEM spec parts. I will be installing all the components myself.
I was in El Paso, TX over Thanksgiving and dropped in at 4 Wheel Center. This is a very reputable off-road accessory shop.
4 Wheel Center
www.4wheelcenter.com
I explained to the tech what I was considering. This is what we came up with. Install the OME/Bilstein rear shocks, new Spring Insulators, hockey puck bump stops and record the new rear ride height dimension measured from the center of the wheel to the fender opening. The 4 Wheel Center is going to preassemble my OME/Bilstein front shock assemblies. New top mounts and spring isolators will be installed as well. With the rear height measurements, they will ensure the adjustable front shocks are set so that I have a level ride height in front. Then they will ship the assembled front shock assemblies to me so I can install them.
I went ahead and ordered the following:
• OME 2926 front springs since I am not adding any steel bumpers, winches etc.
• Bilstein B8 5100 24-282642 front shocks.
• Two New Mopar Front Clevis 4670456AB (Ebay). Note: I had to also order new pinch bolts and clevis mount bolts and nuts as these are stamped steel clevises and the originals are cast. There is note for to use new hardware if switching from Cast to 'stamped steel clevises. Two New Pinch Bolts 6509430AA. Two New Clevis mounting bolts 6507620AA, Two New Clevis mounting nuts 6102251AA. New clevis hardware ordered from Moparpart.com
• OME 2731 rear springs (EBay)
• Bilstein 24-185660 rear shocks (Amazon )
• JBA-5.5.00.EZ Upper Control Arms (JBA)
• Moog RK622147 Front Right Lower Control Arm (Rock Auto)
• Moog RK622148 Front Left Lower Control Arm (Rock Auto)
• Teraflex 1903200 Front Bump stops (Teraflex)
• 4- Hockey Pucks for rear bump stops. (Amazon)
• Moog K160059 Rear Coil Spring Isolators (Rock Auto)
• Moog ES800412 Right Outer Tie Rod End (Rock Auto)
• Moog ES800413 Left Outer Tie Rod End (Rock Auto)
• Moog K750127 Sway Bar Links (Rock Auto)
Preparation for rear suspension work:
I ordered a piece of Stainless Steel bushing to make two 1-7/8" bushings for the upper mounts of the Bilstein 24-185660 rear shocks. I found a link to this material in a post from jcook79. Thank you jcook79!
https://a.co/d/213iPUg.
I made sure the ends of the bushings where chamfered, so they wouldn't tear up the rubber bushing in the shock during installation. I installed the bushings using a motorcycle piston wrist pin removal tool to pull them into place. Worked slick!
In addition, I drilled 17/64" holes in the center of 4 hockey pucks and then used a 3/4" spade bit to counter sink a hole about 3/8" deep into two of the hockey pucks so that the head of the 1/4" x 20 bolt and washer would sit below the surface of the puck. The 3/4" diameter allows me to use a 7/16 3/8" drive socket no problem.
Yesterday my daughter and I installed the OME 2731 Springs and Bilstein 24-185660 rear shocks along with Hockey Puck Bump Stops and rear new coil spring isolators.
Installation:
* I lifted the rear of the Jeep up so that the suspension was allowed to hang down by placing jack stands just in front of the rear lower control arm front mounts.
*I removed the rear tires, rear shocks, rear coil springs, spring isolators and rear upper bump stops. I also had to remove the rear mounting bolt of the lower rear control arms to help get more articulation of the axle to pull the springs out.
* I drilled and tapped the lower spring perches to accept a Grade 8 - 1/4" x 20 x 2-1/2” long bolt. I figured this would make the hockey puck install Ho easier than trying to install a nut from underneath the spring perch. Tip - Temporarily install a spring isolator pad on the lower spring perch and set one of the pre-drilled pucks in the center of the pad. It will fit perfectly in the opening of the pad. This will let you mark the center of the spring perch for drilling! Worked slick for me!
* Next, I installed the rear springs, reconnected the lower rear control arm bolts, and rear shocks. Tip - I applied anti-seize to the upper shock bolts so they wont rust in the shock bushings. Just an added corrosion preventative measure. Spring compressors would make the new spring installation go much easier. I ended up using a couple of chain clamps on each spring to compress the spring enough to slip it in place.
* Next, I slipped the pucks in between the coils and tightened the Grade 8 - 1/4" x 20 x 2-1/2” bolts down. Red loctite was applied the bolt threads. I also slipped the rear upper bump stops in between the coils and installed them at this time. They pop right in.
* Reinstall the tires and done.
Measurements:
Before New Rear Springs and Shocks. Measurements taken from center of wheel to the bottom of fender opening.
Driver side Front - 17.75"
Driver side Rear - 18.75"
Passenger side Front - 18.25"
Passenger side Rear - 19.25"
After new springs and shocks
Driver side Front - 18.00"
Driver side Rear - 20.75"
Passenger side Front - 18.50"
Passenger side Rear - 21.50"
Quackers rides much better even though we haven't touched the front! The old shocks were pretty worn. My 15 year old daughter could easily collapse them but couldn't collapse the new Bilsteins! Ha ha.
Tomorrow I will call in my measurements to the 4Wheel Center so that they can preset the front shocks to match the ride height of the rear. They should be shipping my assembled front shocks and springs by Tues. One thing is for certain, the front shocks and springs, upper and lower control arms are going to be a bear compared to the rear! Stay tuned!
Hec
Here are some pictures.
Shock and 1-7/8” long bushing
You must be registered for see images attach
Motorcycle piston wrist pin removal tool
You must be registered for see images attach
Bushing installed
You must be registered for see images attach
Spring perch drilled and getting tapped 1/4”x20
You must be registered for see images attach
Tapped
You must be registered for see images attach
You must be registered for see images attach
You must be registered for see images attach
Before
You must be registered for see images attach
After
You must be registered for see images attach
Last edited:


