Rotopax Rear Window Container Holder

Disclaimer: Links on this page pointing to Amazon, eBay and other sites may include affiliate code. If you click them and make a purchase, we may earn a small commission.

slowcrawlerZJ

Member
Joined
Jun 23, 2023
Messages
37
Reaction score
43
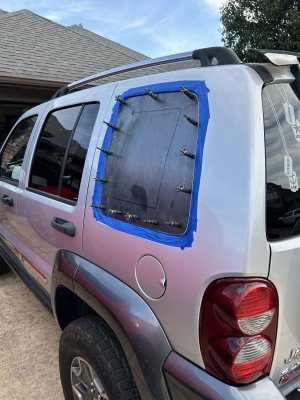
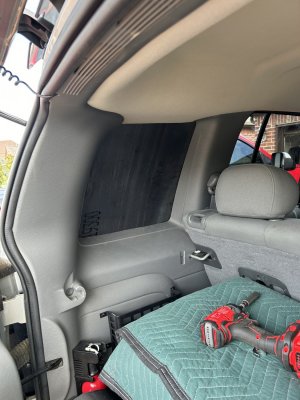
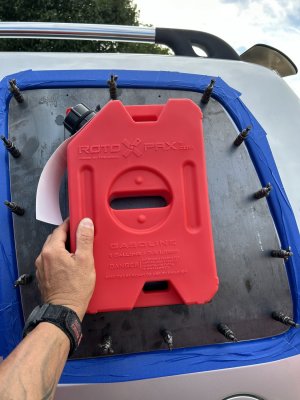
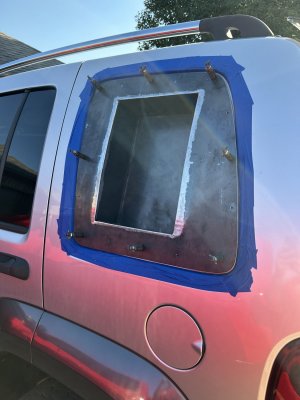
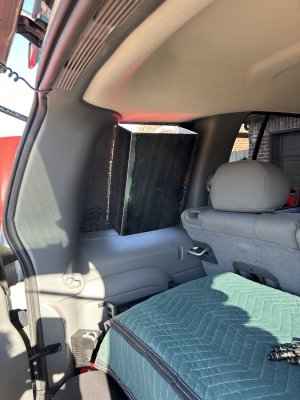
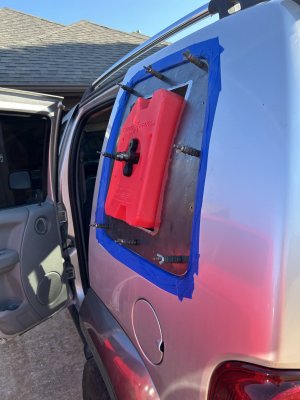
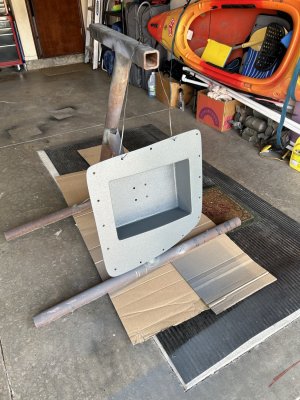
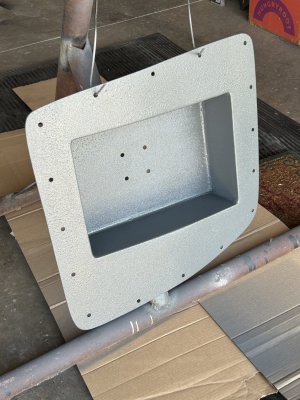
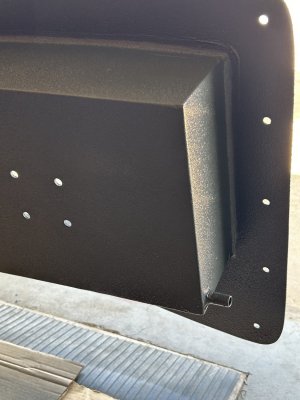
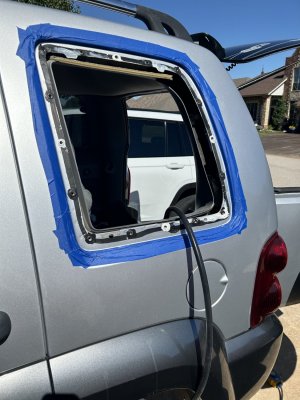
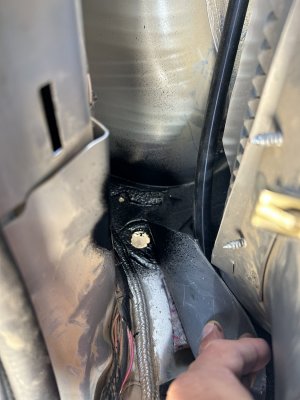
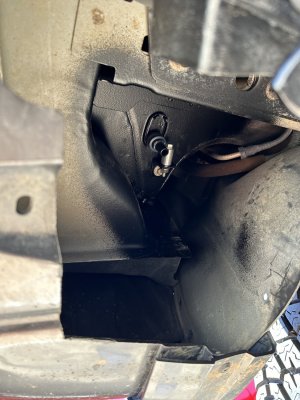
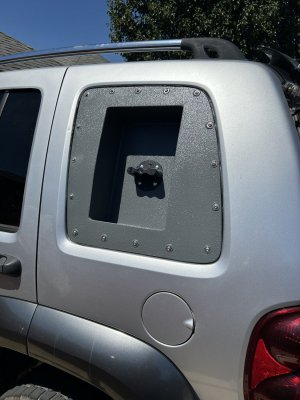
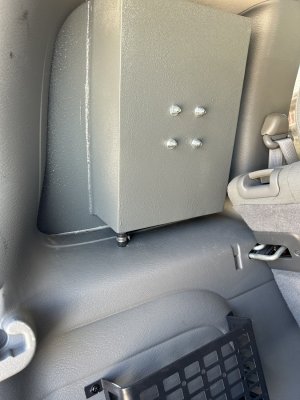
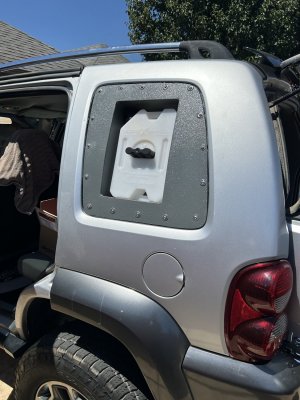
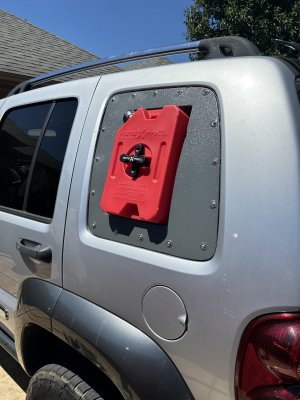
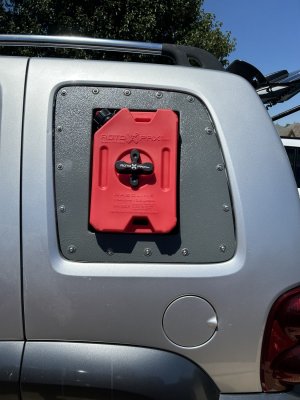
Decided to do something different. I did this back on my 99 Grand Cherokee and haven’t seen it on a Jeep Liberty so figured I like to be different so why not. I’m building a rear window recessed Rotopax container holder. It will securely hold a 1 gallon water and 1 gallon fuel container, stacked on each other. I never use that window any how and it frees up some space inside. So I began by making a template of the rear window. Once I had that mocked up I busted out the rear window. Cleaned all the glass and removed the factory thick rubber gasket material from the frame. I transferred my template onto some 1/8 steel plate. Trimmed it out and since it has a small curvature in the back window I jacked up my jeep and used the weight of the rear Jeep tire and some blocks of wood to help put a small curve in the metal plate. Once I had that down I used my template to drill my holes then transferred those onto my metal. Drilled my holes on the metal. Used aviation sheet metal clecos to hold it in place to get my center box cut out measurement. Once I had that I cut out the hole that will be recessed. Installed it again to get my measurements where I wanted the two one containers to sit and cut my side pieces and welded them on the metal. This is where I am right now. Got to measure out the top and bottom pieces, cut and weld in. So it’s coming out nicely right now.
 

Attachments

  • IMG_5583.jpeg
    IMG_5583.jpeg
    310.8 KB · Views: 22
  • IMG_5584.jpeg
    IMG_5584.jpeg
    308.5 KB · Views: 20
  • IMG_5585.jpeg
    IMG_5585.jpeg
    250 KB · Views: 22
  • IMG_5589.jpeg
    IMG_5589.jpeg
    204.9 KB · Views: 23
  • IMG_5590.jpeg
    IMG_5590.jpeg
    285.8 KB · Views: 23
  • IMG_5592.jpeg
    IMG_5592.jpeg
    223.5 KB · Views: 23

slowcrawlerZJ

Member
Joined
Jun 23, 2023
Messages
37
Reaction score
43
Got some more progress done. I have all sides welded up on the holder, my holes drilled for the RotoPax to mount inside to, primmered all up and all my rivet nuts attached around the window frame to mount to. I had some lessons learned for the one I built for my 99 Grand WJ and that came in the way of adding a drain line. When the RotoPax containers are mounted/recessed they sit at angle to follow the curvature of the jeep so that makes the enclosure angle down to follow suit which will hold water. Really not a big deal but I wanted to make it drain out if water would be sitting there for any amount of time. With that being said I added a 1/2 inch drain line that runs from just inside the back corner of the enclosure through a rubber line back behind the rear window interior panel and drains out from a hole behind the rear wheel well. Works great, not visible and not in the way of anything. I will be attaching more pics of all that process as well soon.
 

slowcrawlerZJ

Member
Joined
Jun 23, 2023
Messages
37
Reaction score
43
Finally had the time to do my least favorite part of metal fabrication…sanding…priming…painting. None the less it’s part of the completion. So I Raptor lined it and then gave it several coats of clear coat to help put an extra sheen on it and for added protection. You can see from the back where my drain tube is that will have a 3/8 tube attached to…to keep water from pooling. More to follow on install.
 

Attachments

  • IMG_5620.jpeg
    IMG_5620.jpeg
    423.1 KB · Views: 5
  • IMG_5621.jpeg
    IMG_5621.jpeg
    406.6 KB · Views: 6
  • IMG_5622.jpeg
    IMG_5622.jpeg
    263 KB · Views: 6
  • IMG_5623.jpeg
    IMG_5623.jpeg
    305.3 KB · Views: 6

slowcrawlerZJ

Member
Joined
Jun 23, 2023
Messages
37
Reaction score
43
Looking good, Can't wait to see the finished product
Appreciate it. Plan is to start the install process tomorrow weather permitting and will post pics of that. After this I’m going back to the front of the jeep and begin my front bumper fabrication with custom headlights etc.
 

slowcrawlerZJ

Member
Joined
Jun 23, 2023
Messages
37
Reaction score
43
Finished up the install today. Took a few hours. I got a few pictures of some of the drain line and where it’s routed from inside behind the rear panel to a hole behind the rear wheel where it drains out. The hose end is hard mounted to a clamp that you can see in one picture. Everything can out good. Next up I’m tackling the front end to fabricate onto my already fabricated winch bucket tow bar set up.
 

Attachments

  • IMG_5628.jpeg
    IMG_5628.jpeg
    306.8 KB · Views: 1
  • IMG_5630.jpeg
    IMG_5630.jpeg
    243.7 KB · Views: 1
  • IMG_5632.jpeg
    IMG_5632.jpeg
    319.7 KB · Views: 1
  • IMG_5633.jpeg
    IMG_5633.jpeg
    298.8 KB · Views: 1
  • IMG_5634.jpeg
    IMG_5634.jpeg
    329.6 KB · Views: 2
  • IMG_5635.jpeg
    IMG_5635.jpeg
    378.9 KB · Views: 2
  • IMG_5636.jpeg
    IMG_5636.jpeg
    326.5 KB · Views: 2
  • IMG_5637.jpeg
    IMG_5637.jpeg
    317.4 KB · Views: 2
  • IMG_5638.jpeg
    IMG_5638.jpeg
    338.5 KB · Views: 1
Top