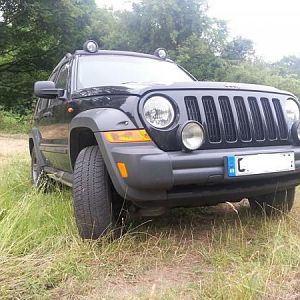
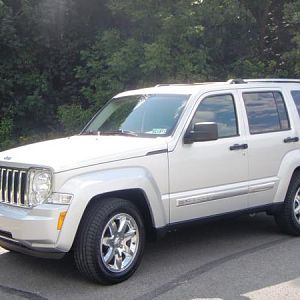
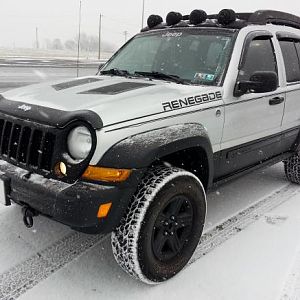
Please note these instructions are for a 2005 KJ 3.7L with the heavy-duty cooling package (which means a mechanical clutch fan in addition to the electric fan). There may be fewer steps necessary in other KJ model years, e.g. I believe that removing the radiator crossmember may not be necessary in some other KJs.
Main tools needed:
Standard sockets - full set but especially 10mm, 13mm, 15mm
Crowsfoot sockets (or flare nut wrenches) - 18mm and 19mm
Wrench - 16mm
Spanner wrench or fan clutch wrench, plus 36mm wrench (all needed ONLY if you need to remove a mechanical fan clutch)
Drill (for removing rivets)
Plastic rivet setter (for replacing rivets)
Approx. 14 plastic rivets
Disconnect the negative terminal of the battery.
Remove the grille.
Remove the hood latch and disconnect the hood release cable from the latch.
Remove the radiator crossmember - this involves removing several bolts and drilling out a rivet holding the washer bottle filler neck to the crossmember. The FSM says that you have to drill out the two large silver rivets holding the hood latch mounting bracket to the crossmember, but this is unnecessary; simply remove the two bolts at the bottom of the mounting bracket and then remove the crossmember with the bracket attached as a single piece.
Removed crossmember with bracket attached:
Remove the front fascia (bumper) - this involves removing the turn signal lamps, drilling out 3 plastic rivets in each wheelarch, approx. 3 rivets underneath the bumper facing downwards, and 2 rivets on the top edge of the bumper facing forward. The exact number and location of the rivets varies with model year.
Removed fascia (stored in my ZJ because I have no garage):
Now you have to remove the grille reinforcement. Behind the driver's side headlamp you will find the large power connector that feeds the electrical devices mounted on the reinforcement; slide the red locking tab to unlock the connector and pull the two sections apart. Remove the bolts securing the grille reinforcement and then remove the pushpins holding the rubber flaps to the reinforcement. The reinforcement should then lift off:
Remove the fan and serpentine belt.
By now, the front of the Jeep should look like this:
If you look in the space behind the driver's headlamp, you can see the high-pressure hose bracket:
Remove the two bolts to release the bracket. Then follow the hose to disconnect it at the power steering pump; the connector is behind the pump pulley and uses a 16mm wrench (see arrow - photo taken before belt was removed):
Have a drain pan ready under the Jeep to catch the power steering fluid that will be released.
Disconnect the hose at the steering gear using an 18mm crowsfoot or flare nut wrench. The high-pressure hose is the upper one circled in yellow:
Remove the high-pressure hose assembly from the Jeep and transfer the bracket onto the new hose. A fair amount of brute force is required to bend the bracket clamps open and then closed again.
Disconnect the return hose from the steering gear (it's the hose beneath the high-pressure one) and then disconnect it from the oil cooler. It's the lower hose:
If you still have an OEM return hose you will probably need to use pliers or side-cutters (or both) to remove a pinch-clamp securing it to the cooler. Once the clamp is removed the hose should slide off easily.
As a side-note, this is one of the reasons why it's necessary to go to such lengths to remove the grille reinforcement (which requires removing the bumper first). It is near-impossible to access the return hose at the cooler while the reinforcement is in place. The other reason is that the high-pressure hose mounting bracket bolts are directly beneath the driver's side headlamp, and removing the lamp by itself doesn't provide access - the reinforcement has to come out too.
From here on in, it's essentially just reversing everything - fit the new hoses, put everything back together, and refill and bleed the power steering system.
But here's a warning...
When I fitted the new hoses, I found that they didn't screw in flush with the steering gear housing, there were still threads visible:
I thought I may have cross-threaded them, but I hadn't. I refilled and bled the system and there were no leaks (what looks like a leak from the lower hose in the above photo is just a bit of stray fluid trapped between the hose and the screw fitting).
I should have just left it there but I thought I needed to get both hoses flush with the housing. I applied too much force to the pressure hose and cracked a chunk out of the steering gear housing - an expensive mistake. I have since learned, from someone who has replaced numerous PS hoses on KJ's, that it is actually very unusual for the hoses to screw flush to the housing. Hey ho.
Main tools needed:
Standard sockets - full set but especially 10mm, 13mm, 15mm
Crowsfoot sockets (or flare nut wrenches) - 18mm and 19mm
Wrench - 16mm
Spanner wrench or fan clutch wrench, plus 36mm wrench (all needed ONLY if you need to remove a mechanical fan clutch)
Drill (for removing rivets)
Plastic rivet setter (for replacing rivets)
Approx. 14 plastic rivets
Disconnect the negative terminal of the battery.
Remove the grille.
Remove the hood latch and disconnect the hood release cable from the latch.
Remove the radiator crossmember - this involves removing several bolts and drilling out a rivet holding the washer bottle filler neck to the crossmember. The FSM says that you have to drill out the two large silver rivets holding the hood latch mounting bracket to the crossmember, but this is unnecessary; simply remove the two bolts at the bottom of the mounting bracket and then remove the crossmember with the bracket attached as a single piece.
Removed crossmember with bracket attached:
You must be registered for see images
Remove the front fascia (bumper) - this involves removing the turn signal lamps, drilling out 3 plastic rivets in each wheelarch, approx. 3 rivets underneath the bumper facing downwards, and 2 rivets on the top edge of the bumper facing forward. The exact number and location of the rivets varies with model year.
Removed fascia (stored in my ZJ because I have no garage):
You must be registered for see images
Now you have to remove the grille reinforcement. Behind the driver's side headlamp you will find the large power connector that feeds the electrical devices mounted on the reinforcement; slide the red locking tab to unlock the connector and pull the two sections apart. Remove the bolts securing the grille reinforcement and then remove the pushpins holding the rubber flaps to the reinforcement. The reinforcement should then lift off:
You must be registered for see images
Remove the fan and serpentine belt.
By now, the front of the Jeep should look like this:
You must be registered for see images
If you look in the space behind the driver's headlamp, you can see the high-pressure hose bracket:
You must be registered for see images
Remove the two bolts to release the bracket. Then follow the hose to disconnect it at the power steering pump; the connector is behind the pump pulley and uses a 16mm wrench (see arrow - photo taken before belt was removed):
You must be registered for see images
Have a drain pan ready under the Jeep to catch the power steering fluid that will be released.
Disconnect the hose at the steering gear using an 18mm crowsfoot or flare nut wrench. The high-pressure hose is the upper one circled in yellow:
You must be registered for see images
Remove the high-pressure hose assembly from the Jeep and transfer the bracket onto the new hose. A fair amount of brute force is required to bend the bracket clamps open and then closed again.
Disconnect the return hose from the steering gear (it's the hose beneath the high-pressure one) and then disconnect it from the oil cooler. It's the lower hose:
You must be registered for see images
If you still have an OEM return hose you will probably need to use pliers or side-cutters (or both) to remove a pinch-clamp securing it to the cooler. Once the clamp is removed the hose should slide off easily.
As a side-note, this is one of the reasons why it's necessary to go to such lengths to remove the grille reinforcement (which requires removing the bumper first). It is near-impossible to access the return hose at the cooler while the reinforcement is in place. The other reason is that the high-pressure hose mounting bracket bolts are directly beneath the driver's side headlamp, and removing the lamp by itself doesn't provide access - the reinforcement has to come out too.
From here on in, it's essentially just reversing everything - fit the new hoses, put everything back together, and refill and bleed the power steering system.
But here's a warning...
When I fitted the new hoses, I found that they didn't screw in flush with the steering gear housing, there were still threads visible:
You must be registered for see images
I thought I may have cross-threaded them, but I hadn't. I refilled and bled the system and there were no leaks (what looks like a leak from the lower hose in the above photo is just a bit of stray fluid trapped between the hose and the screw fitting).
I should have just left it there but I thought I needed to get both hoses flush with the housing. I applied too much force to the pressure hose and cracked a chunk out of the steering gear housing - an expensive mistake. I have since learned, from someone who has replaced numerous PS hoses on KJ's, that it is actually very unusual for the hoses to screw flush to the housing. Hey ho.


