BluPhant
Full Access Member
This article should apply to all 02-04 KJs. I have no ideas if the 05s are even remotely similar.
The sport KJs dont have under-dash lights installed, like their more trimmed out bretherin. Adding these lights to your KJ is a pretty simple addition, that really makes a difference (at least in my estimation)
The parts you'll need for this project are available at your jeep dealer - probably not a stock item, so calling ahead is advised. You'll need to order 2 of part #56042559AA (Approx $10 ea).

This is a view of the courtesy light as its installed under-dash.
As with any electrical project it's always a good idea to pull your ground prior. I didn't, but I probably should have.
The wiring for these lights is already in your vehicle, you just have to get at it, it's just kind of a pain in the side to get at. If your hands resemble vienna sausages, you'll probably want to find someone with thin fingers to help you =P~
You'll need to remove the lower panels on the driver and passenger side. You'll note a hole in the drivers side, and a recessed (really recessed) hole in the passenger side. This is where the lights will go.
On the drivers side, the connector is taped to the large harness, I'm pretty sure it was up on the steering column. It's taped there, so you'll have to cut the tape and bring the wire down. You can then attach the light to the dash, the screw is already there.
The passenger side is a bit more of a hassle .. the connector is taped to another group of wires that run behind the plastic on the lower part of the glove compartment. I found that pulling the glove compartment out (flipping it all the way forward) and reaching up from underneath, I was able to get the connector to a place where I could, from the top, cut the tape and free the connector. Once you've got the connector, it's as simple a proposition as the drivers side. Again, the screw is already there, so attach the light to wire, screw it in, you're done.
Updated instructions from tmwr1 on JU.....
[tmwr1]
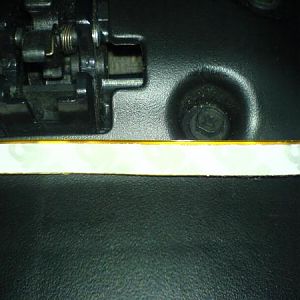
To get at the tape holding the plug and wire to the cable harness. I released the cable hold down fastener (red arrow in picture) by squeezing its fingers with pliers and pushing it back out of the way. Also, to get a tiny bit more space to work at the plug, I loosened the screw (green arrow) that's holding the dash.
Carefully pull up on the courtesy lamp wire to get at the tape and release the plug. Once you have it out, push the cable back down and snap the cable fastener back in place. Reach behind the bar with one finger to push that connector back- there's more space in that area to easily get a finger in there.
[/tmwr1]
Re-attach the panels, making sure that the lights line up properly (since they are secured by but one screw, there is a little play) and you should be good to go!
These lights mimic the overhead lights, i.e. they dim before shutting off, come on when door open, etc.
Enjoy!
-BP
The sport KJs dont have under-dash lights installed, like their more trimmed out bretherin. Adding these lights to your KJ is a pretty simple addition, that really makes a difference (at least in my estimation)
The parts you'll need for this project are available at your jeep dealer - probably not a stock item, so calling ahead is advised. You'll need to order 2 of part #56042559AA (Approx $10 ea).

This is a view of the courtesy light as its installed under-dash.
As with any electrical project it's always a good idea to pull your ground prior. I didn't, but I probably should have.
The wiring for these lights is already in your vehicle, you just have to get at it, it's just kind of a pain in the side to get at. If your hands resemble vienna sausages, you'll probably want to find someone with thin fingers to help you =P~
You'll need to remove the lower panels on the driver and passenger side. You'll note a hole in the drivers side, and a recessed (really recessed) hole in the passenger side. This is where the lights will go.
On the drivers side, the connector is taped to the large harness, I'm pretty sure it was up on the steering column. It's taped there, so you'll have to cut the tape and bring the wire down. You can then attach the light to the dash, the screw is already there.
The passenger side is a bit more of a hassle .. the connector is taped to another group of wires that run behind the plastic on the lower part of the glove compartment. I found that pulling the glove compartment out (flipping it all the way forward) and reaching up from underneath, I was able to get the connector to a place where I could, from the top, cut the tape and free the connector. Once you've got the connector, it's as simple a proposition as the drivers side. Again, the screw is already there, so attach the light to wire, screw it in, you're done.
Updated instructions from tmwr1 on JU.....
You must be registered for see images
[tmwr1]
To get at the tape holding the plug and wire to the cable harness. I released the cable hold down fastener (red arrow in picture) by squeezing its fingers with pliers and pushing it back out of the way. Also, to get a tiny bit more space to work at the plug, I loosened the screw (green arrow) that's holding the dash.
Carefully pull up on the courtesy lamp wire to get at the tape and release the plug. Once you have it out, push the cable back down and snap the cable fastener back in place. Reach behind the bar with one finger to push that connector back- there's more space in that area to easily get a finger in there.
[/tmwr1]
Re-attach the panels, making sure that the lights line up properly (since they are secured by but one screw, there is a little play) and you should be good to go!
These lights mimic the overhead lights, i.e. they dim before shutting off, come on when door open, etc.
Enjoy!
-BP


