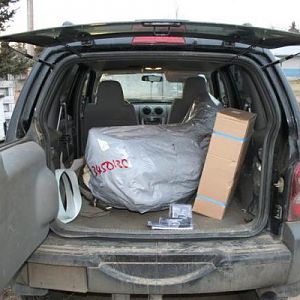
Installing OME lift this weekend.... COMPLETED AND AWESOME!

Disclaimer: Links on this page pointing to Amazon, eBay and other sites may include affiliate code. If you click them and make a purchase, we may earn a small commission.

JasonJ

Full Access Member
Joined
Jul 8, 2013
Messages
1,521
Reaction score
53
Location
Michigan
Installing OME lift this weekend....

So far the rear is disassembled.. Took far too long to get that far. Some rusted wheel nuts and now trying to get the rear sway/torsion bar off, bolts on that are stiff and stubborn too!

To make it worse, what should be a simple R&R job, I can't seem to get enough flex downward on one side or the other of the axle to get the new springs in. Almost there!

If the sway bar comes off, should have enough flex. Also thinking of disconnecting the upper control arm. Not sure if that's necessary though.

Took a break to take the kid to a movie... Will tackle it again tonight and tomorrow. As it is now, I have tk at least finish the rear to make it driveable to get to work Monday.

Damn rusty bolts... But oddly enough the underside isn't rusted much at all.

Suggestions while I take a break?
 
Last edited:

uss2defiant

Full Access Member
Joined
Jun 25, 2014
Messages
3,600
Reaction score
157
Location
Tucson, Arizona
spray everything you need to unbolt w/ penetrating fluid.

I haven't tackled this before but I think if you unbolt the LCA you would have more than enough room for the new springs to go in.
 
Last edited:

tommudd

Moderator
Staff member
Moderator
Joined
Jul 14, 2005
Messages
22,450
Reaction score
3,649
Location
Southeastern Ohio
So far the rear is disassembled.. Took far too long to get that far. Some rusted wheel nuts and now trying to get the rear sway/torsion bar off, bolts on that are stiff and stubborn too!

To make it worse, what should be a simple R&R job, I can't seem to get enough flex downward on one side or the other of the axle to get the new springs in. Almost there!

If the sway bar comes off, should have enough flex. Also thinking of disconnecting the upper control arm. Not sure if that's necessary though.

Took a break to take the kid to a movie... Will tackle it again tonight and tomorrow. As it is now, I have tk at least finish the rear to make it driveable to get to work Monday.

Damn rusty bolts... But oddly enough the underside isn't rusted much at all.

Suggestions while I take a break?

stock jack between frame and hub/ brake caliper mounting pint , will help get one side down far enough, have installed 4 inch plus springs by myself that way.
By the way finally have Mom out of hospital as well as me , so can finally ship that box out, just get the holes drilled
But if anyway possible get that sway bar off, bolts are long, we've had to cut them off before due to rust
 

JasonJ

Full Access Member
Joined
Jul 8, 2013
Messages
1,521
Reaction score
53
Location
Michigan
stock jack between frame and hub/ brake caliper mounting pint , will help get one side down far enough, have installed 4 inch plus springs by myself that way.

By the way finally have Mom out of hospital as well as me , so can finally ship that box out, just get the holes drilled

But if anyway possible get that sway bar off, bolts are long, we've had to cut them off before due to rust


That's awesome advice Tom.. Thanks so much. It got super frustrating for something that should have been done in less than an hour. I may just cut the heads off of the sway bar bolts. Everything else came apart fine on the rear.

Glad to hear you and mom are finally home. I know how that goes, it's rough.

Half inch holes for the rear puck bump stops, right?
 

JasonJ

Full Access Member
Joined
Jul 8, 2013
Messages
1,521
Reaction score
53
Location
Michigan
Holes to match hardware, I used 1/4 I think.

I had already drilled a 1/2" hole on the left side... I'll do the same on the right and get matching bolts, about 2 1/2" long or so. Some flat washers and a lock nut to match.

May have some thread peening and rounding over on a few wheel studs. Ugh. It's the little shit that makes a basic job so hard.

Replacing those might need to be phase 2. If I can get wheel nuts on without destroying anything
 

JasonJ

Full Access Member
Joined
Jul 8, 2013
Messages
1,521
Reaction score
53
Location
Michigan
All done with the rear... Getting the useless rear sway bar off made all the difference in the world. Other than fighting with rusty wheel nuts/studs.

Springs went right in with a little prying with a 5' bar to get that extra half inch. The Monroe load leveler shocks needed two washers at the top and prying to compress them a bit to align the bottom hole.

Sitting at 22 1/2" middle of rear hub to edge/lip of fender flare. Up from 18.0". Hoping for no more than half an inch of settling. Will recheck bolt torque on everything in about 50 miles or so.

Now to do the front! Road test after doing just the rear is encouraging. Already a lot quieter and smoother riding. Steers funny with only the rear done. Looking to finish fronts on Tuesday.

Pictures later.....
 

JasonJ

Full Access Member
Joined
Jul 8, 2013
Messages
1,521
Reaction score
53
Location
Michigan
I will be installing my lift starting Wednesday, I’m hoping to learn from your issues.

Please feel free to message me or post in this thread... I can help. I absolutely see how this goes so much faster for those who have done it at least ONCE. So many tips, tricks, lessons learned the first time (which is always how it goes with any repair job).

I think part of my issue is, it being a Michigan Jeep combined with the fact that I have had to do literally no moderate or major repairs to this thing.. bolts were rusted, froze, or still had 16 yr old factory red loctite on them. It's never been apart before.

Front's are being done tomorrow.. will update then.

Oh, and Randy... absolutely remove the rear sway bar. I could get the rearmost bolt half out with the impact, but had to to the front and finish the rear bolt by hand.. 2ft breaker bar and 18mm socket. A quarter to 1/3 turn at a time... it took a while, but think of it as your rowing strength training day.
 

tommudd

Moderator
Staff member
Moderator
Joined
Jul 14, 2005
Messages
22,450
Reaction score
3,649
Location
Southeastern Ohio
I will be installing my lift starting Wednesday, I’m hoping to learn from your issues.

Just R&Ring everything, very easy
After you do a few only takes a couple of hours with an extra 30-40 minutes for front UCAs added
Doing another one Tuesday or Wednesday this week, expecting 2 hours of my time working slow
First one takes a bit longer , some remove some parts I don't, I remove some they don't so...........LOL
 

tommudd

Moderator
Staff member
Moderator
Joined
Jul 14, 2005
Messages
22,450
Reaction score
3,649
Location
Southeastern Ohio
Please feel free to message me or post in this thread... I can help. I absolutely see how this goes so much faster for those who have done it at least ONCE. So many tips, tricks, lessons learned the first time (which is always how it goes with any repair job).

I think part of my issue is, it being a Michigan Jeep combined with the fact that I have had to do literally no moderate or major repairs to this thing.. bolts were rusted, froze, or still had 16 yr old factory red loctite on them. It's never been apart before.

Front's are being done tomorrow.. will update then.

Oh, and Randy... absolutely remove the rear sway bar. I could get the rearmost bolt half out with the impact, but had to to the front and finish the rear bolt by hand.. 2ft breaker bar and 18mm socket. A quarter to 1/3 turn at a time... it took a while, but think of it as your rowing strength training day.

sway bar bolts= Metabo 6" Wheel Diam Angle & Disc Grinder
works everytime LOL
Had to use it on a lot of them, dang long bolts, rusted
 

JasonJ

Full Access Member
Joined
Jul 8, 2013
Messages
1,521
Reaction score
53
Location
Michigan
sway bar bolts= Metabo 6" Wheel Diam Angle & Disc Grinder
works everytime LOL
Had to use it on a lot of them, dang long bolts, rusted

I almost did that... but I finally got the left rear off, and the right side was not as bad...

Odd how rusty the bolt threads were, yet my lower control arms themselves are in great shape. Factory also had red loctite on those suckers.

So the front... I see some people disconnect outer tie rod ends, others don't... is removing the caliper and hanging it out of the way necessary to not pull too much on brake hose? Some how-to guides seem to omit that part, if needed.
 

tommudd

Moderator
Staff member
Moderator
Joined
Jul 14, 2005
Messages
22,450
Reaction score
3,649
Location
Southeastern Ohio
I almost did that... but I finally got the left rear off, and the right side was not as bad...

Odd how rusty the bolt threads were, yet my lower control arms themselves are in great shape. Factory also had red loctite on those suckers.

So the front... I see some people disconnect outer tie rod ends, others don't... is removing the caliper and hanging it out of the way necessary to not pull too much on brake hose? Some how-to guides seem to omit that part, if needed.

I remove the tie rods ends, one whack with the hammer to knock em loose so it easy and they are out of the way
calipers off and hanging with wire etc
get as much out of the road as possible, knock the upper ball joint loose after removing nut then running it back up on a few threads to protect the threads when you hit it . And smack it like ya mean it, many would try to lightly tap it when I was teaching them. HIT IT Hard, think about your Ex or something and hit it once and done LOL
also sway bar links, remove and then wait for full weight on ground before trying to reattach them
 

JasonJ

Full Access Member
Joined
Jul 8, 2013
Messages
1,521
Reaction score
53
Location
Michigan
I guess I should feel lucky I’m in the desert in that regard

Indeed... the low moisture should help.

Anyone know how to edit a thread title? I tried but it only changed the title of my initial post #1.
 

JasonJ

Full Access Member
Joined
Jul 8, 2013
Messages
1,521
Reaction score
53
Location
Michigan
Finished the job. Ran into a few slowdowns. Namely I had a left outer tire rod end to replace, and that darn thing didn’t want to come off the tire rod itself.

ended up cutting a relief slot in it, then was able to get it loose enough to come off. In terms of alignment, that one part is what threw it off the most. The lift actually brought my camber very much closer back to spec.

i’m sitting at 22 inches on the left front, 22 1/4 or so on the right front. Not sure why it’s different. Was expecting 22 on both sides. But I suppose it’s close enough.

I ended up assembling the cleavers fork onto the shark while the shark was mounted in the vehicle. I disassembled it that way as well. I found that it gave me more clearance to separate it into two parts.

on way to alignment shop now. It’s going to run me about $89.95, but they can get it done now. The other shop I wanted to go to for an alignment, is about half the cost, but they can’t get me in for almost a week. Which seems crazy.

Will update with photos later.
 

JasonJ

Full Access Member
Joined
Jul 8, 2013
Messages
1,521
Reaction score
53
Location
Michigan
You must be registered for see images attach


You must be registered for see images attach


You must be registered for see images attach
 

duderz7

Full Access Member
Joined
Jan 20, 2016
Messages
1,504
Reaction score
1,260
Location
Weiser, ID
I didn't have to cleaver any sharks when I did mine, but I'm glad it worked out, looks good.
 

JasonJ

Full Access Member
Joined
Jul 8, 2013
Messages
1,521
Reaction score
53
Location
Michigan
I didn't have to cleaver any sharks when I did mine, but I'm glad it worked out, looks good.


Haha yeah... Clevis fork. Was using voice dictation to post that. Too much to type on a phone I felt.
 

Latest posts

Members online

Top