What did you do to your jeep today?

Disclaimer: Links on this page pointing to Amazon, eBay and other sites may include affiliate code. If you click them and make a purchase, we may earn a small commission.

seafish

Full Access Member
Joined
Jan 10, 2024
Messages
264
Reaction score
356
Finally had time today to make more progress by properly placing and carefully torquing the various plates and pieces of the new Valair "Quiet" Organic Dual Disk clutch onto the back of the mighty Cummins. Good thing that it comes in several pieces…that sucker is heavy!!!

Notice the short black straps un the first picture that keep the center "floater" plate from rattling against the flywheel whenever the clutch is depressed.

Also got the new throwout bearing and fork on to the front of the front of the transmission.

Hopefully get them stabbed back together and the truck up and running over the weekend

You must be registered for see images attach
 
Last edited:

seafish

Full Access Member
Joined
Jan 10, 2024
Messages
264
Reaction score
356
Prepped for tomorrow by making the gasket that goes between the shift tower and the G56 transmission which (like many Jeep parts ;)) is not available anymore. Most people use RTV, but I decided to make a cardboard template and then copied the template on to some cork/rubber. Im also gonna make one out of some thinner fiber gasket material, round the inside corners on it a little better, then decide which one to use tomorrow.


You must be registered for see images attach
 

duderz7

Full Access Member
Joined
Jan 20, 2016
Messages
1,501
Reaction score
1,258
Location
Weiser, ID
Prepped for tomorrow by making the gasket that goes between the shift tower and the G56 transmission which (like many Jeep parts ;)) is not available anymore. Most people use RTV, but I decided to make a cardboard template and then copied the template on to some cork/rubber. Im also gonna make one out of some thinner fiber gasket material, round the inside corners on it a little better, then decide which one to use tomorrow.


You must be registered for see images attach
That's some mighty fine work!
 

seafish

Full Access Member
Joined
Jan 10, 2024
Messages
264
Reaction score
356
That's some mighty fine work!

Years ago I was passing through a small town with a large hardware store that in its heyday was used to service the Redwood lumber industry.

Walking through the store, smiling and with mouth agape, I saw that they had a couple aisles of those old steel cabinets with steel drawers… NO cardboard boxes here. Even though they were 1/100th the size, their stocked hardware items put Tractor Supply and Home Depot to shame.

I went a little crazy when i saw their "gasket" drawers and bought a couple sheets of each kind and thickness material and IIRC still didnt spend more then $20 total. :cool:
 

Deb'nKJ

Full Access Member
Joined
Jun 3, 2022
Messages
633
Reaction score
535
Location
somewhere between London & Zunny Deb'n (England)
So Saturday provided the opportunity (& the weather) to fit the replacement window & regulator in the passenger door. Apart from a nasty moment when it it seemed to be stuck at 45* (proved to be a few bits of glass stuck in the back runner) getting the glass in was not too bad bit the regulator was another story. I got as far as starting the bolts at the foot of the upright & one for the motor, but try as I might I can't get the top of the upright, or the motor, flat against the inside of the door. I gave up when the temperature started too drop & I wasn't making any progress. Tried again today, when my wrists were so sore & my knees didn't ache - but didn't really have a lot of time & my heart wasn't really in it.

I might be able to devote a little time to it next Saturday but, meanwhile, assuming I'm going about this the right way (if not, I'm sure someone'll put me right) does anyone have any helpful hints?
 

seafish

Full Access Member
Joined
Jan 10, 2024
Messages
264
Reaction score
356
Got the G56 stabbed back onto the Cummins today …working by myself, it took longer then I expected and I am tired.

Next time (actually given the quality and holding power of the clutch I bought, I am hoping that there wont ever need to be a next time!!!) but if there is, I will definitely buy, rent or make a ******/scissor lift for easier alignment and rolling into place.

That said, I was still able to keep the longer guide bolts that I ran through the g56 bell housing and into the adapter plate finger loose (in other words in perfect alignment) while I used a ratchet strap hooked to the front of the jack and a bolted down work bench to slowly pull the transmission forward while I adjusted the angle of the dangle with a stubby bottle jack placed piggyback on top of the floor jack and also while I kept checking the guide bolts for free play.

A final smack with a single jack at the back of the floor jack sent her all the way home !!! :cool:

In the last pic, you can see the newly R&R'd heat/sound shield. I used some excellent industrial grade aluminized self adhesive fiber mat from ResoNix and first also applied their highly regarded Mega CLD tiles to the actual underside of the transmission tunnel. Im looking to get this 3rd gen Cummins Ram almost as quiet as the newer 4th gen trucks !!!


You must be registered for see images attach
 
Last edited:

KJowner

Full Access Member
Joined
Oct 20, 2022
Messages
1,430
Reaction score
815
Location
Uk
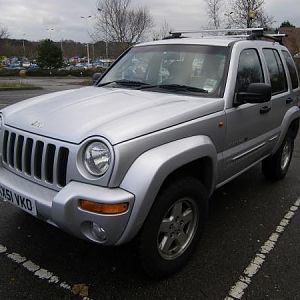
Still away from home but I'm fed up with the yellowed candle light headlights and the dusty looking upper brake light, so I've ordered some proper 2K UV resistant clear coat. I'm going to get them shining like new before the full joy of dark, cold and wet winter arrives, might try some of the Phillips uprated bulbs too.
 

Deb'nKJ

Full Access Member
Joined
Jun 3, 2022
Messages
633
Reaction score
535
Location
somewhere between London & Zunny Deb'n (England)
I found a tin of Brasso in my dear ol' dad's garage, worked wonders for cloudy headlights, clear coat afterwards might mean it doesn't need doing every 6 months.

Those Philips bulbs are good but not necessarily the best at the time of purchase. Have a gander at the TacomaWorld forum, you'll find what I reckon is the definitive guide to conventional headlights & theuse of halogen bulbs, including a continuously update best buy section.

Before the bulbs though, install an uprated harness (that's loom to us) with relays, so the headlights actually receive 12-14 volts.
 

seafish

Full Access Member
Joined
Jan 10, 2024
Messages
264
Reaction score
356
Years ago, the OG (original guru) of vehicle forward lighting, Daniel Stern, turned me onto the Phillips Xtreme Power and Xtreme Vision bulbs to use in the p*ss poor headlights on my 3rd gen Dodge Ram. After seeing a noticeable and improved quality of nighttime visibility with them, with NO downside of shorter lifespan or blinding others, I have slowly converted ALL my vehicles to using those bulbs. IMO, they continue to be a decent lighting upgrade for minimal expense and trouble.

Of course, eventually I would love to retrofit HID projectors into the OEM headlight housings of BOTH the Ram and the Jeep, or earn enough money to afford some decent aftermarket LED projector headlights (NO cheap ones for me TY) but for now must content myself with the Phillips bulbs.

If for some reason you have never read Daniel Sterns website, trust me, it is worth a long perusal…PLENTY of good information with no advertisements or marketing, though you CAN purchase products from him if you send him an email.


Deb'nKJ

Full Access Member
Joined
Jun 3, 2022
Messages
633
Reaction score
535
Location
somewhere between London & Zunny Deb'n (England)
No doubt DS knows his stuff, but it's all a bit dry & academic for me, whereas the guy on TacomaWorld is more hands on/down to earth - & you have to respect a guy who puts his hand in his pocket when a new bulb comes out, just so he can test them & post his findings.

Like I said, those Phillips bulbs are good, but which are best at any given time is constantly changing, with the main players swapping positions, particularly when there's a new development; DS is, of course well aware of this - & his current recommendation is "60/55W Osram-DSL +250 (easily the world's best H4 . . . "
 

seafish

Full Access Member
Joined
Jan 10, 2024
Messages
264
Reaction score
356
Still working on the big truck, but getting closer and closer to lowering it back to the ground for a test drive with the new clutch. :p

So today, after work, I got the transmission filled, the shift and transfer case linkage hooked up and the shift boots and console all put back in.

I also installed the new stop and go pedals.
Well Im calling them new, but they have been sitting on a shelf in the shop for at least 6 years now. :rolleyes:

Machined, formed and anodized aluminum non slip pads … carefully drilled, tapped and threaded with 8-32 stainless hardware into the OEM pedals. :cool:


You must be registered for see images attach
 
Last edited:

seafish

Full Access Member
Joined
Jan 10, 2024
Messages
264
Reaction score
356

Of course that's in the eye of the beholder … I'm pretty sure the wife does NOT think so!!!

That said, they actually make them for Jeeps as well, though they have gone up in price a bit since I bought them.


Luke

Interloper
Joined
Oct 21, 2008
Messages
4,200
Reaction score
668
Location
Bancroft, Canada
You just need to approach it differently… ;)
Espousing the added safety via the increased gripping ability of the pedal surface is the trick. :D
 

seafish

Full Access Member
Joined
Jan 10, 2024
Messages
264
Reaction score
356
Today, after finish planing 4000' of 1 x 4 rough and quarter sawn redwood in the woodshop, I walked over to the mechanics shop to keep putting the big truck back together.

My "end of day" goal was simply to mount the 48RE/NV271 adapter support bracket onto the transfer case and then reinstall the skid plate and refill the TC with 2 quarts of ATF+4.

Attaching the adapter bracket to the NV271 was straightforward, but when I grabbed the skid plate to finish the install, I realized that I needed to clean the dirt and grease from it first. Then, once I had cleaned the dirt and grease off, I saw all of the rust and realized that I needed to wire brush and repaint the whole dam thing.

Overall it took an extra hour, but I got the skid plate brushed down, cleaned up, rinsed off (thank god for acetone), primed and repainted (thank god for the chemists at Rustoleum) and back inside the shop as the fog rolled in and the sun set. ;)

Time for a G&T and then dinner… I'll have to finish the support bracket install tomorrow.

You must be registered for see images attach
 
Last edited:

Latest posts

Members online

Top